This repository contains the exact configuration of all my workstations, gaming computers, laptops and even a couple of VPSes. Of course, your situation will differ, but I believe the installation instructions and Ansible roles contained herein will be a great starting point for anyone who wants to enjoy using a minimalist setup to its maximum potential.
Yes, it kind of is! Except that all that I'm distributing is a bunch of Ansible roles and the installation instructions. Even if for nothing but my own benefit, I would love to one day compile all this into a custom Debian installer.
You should not use this at all, this system is tailored exactly to my own needs and nothing more. However, you may find some configuration gems here that you can use in your own setup. Find an old laptop or spin up a VM and give it a try if you want to see how a fellow GNU/Linux enthusiast has configured their computer!
Keep reading! This README contains all the steps needed to install Debian, set up the base system, and run the Ansible playbook that will take care of the remaining configuration.

Let's return to the source and start with a minimal, vanilla Debian installation. Visit Debian.org and click Download, then write the image to a USB flash drive with:
sudo dd if=debian-12.2.0-amd64-netinst.iso of=/dev/sdX
Make sure you substitute X with the correct letter of your USB
drive. If this is your first time installing GNU/Linux, you'll have to
google for an alternative to dd for the operating system you're
currently using. There are plenty, but none of them are as
straightforward to use as the original dd. By the way, this is one
of the main reasons I enjoy using GNU/Linux so much: for almost every
imaginable task there is a suitable tool that does the job well. Also,
all of these tools can easily be scripted, but we'll get to that
later. For now, do your best to reboot your computer in such a way
that you arrive at the following screen:
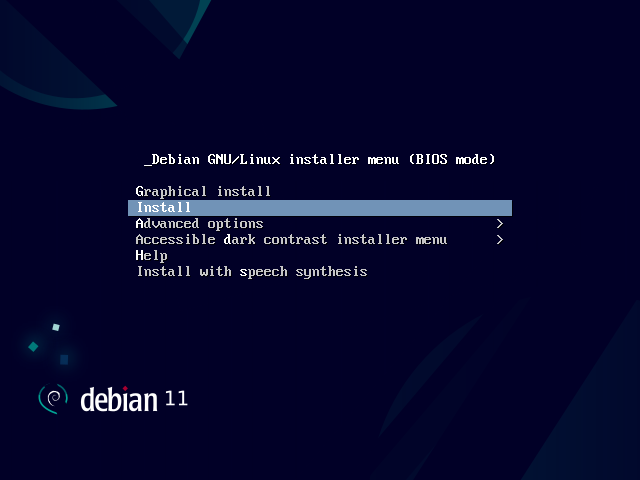
Hurrah! The hardest part – getting your computer to successfully boot from a USB stick – is over! Note that the screenshot says "BIOS mode", but if you manage to boot the "UEFI Installer menu" that is probably even better. The second hardest part is choosing a hostname for the new system. Get your inspiration at https://namingschemes.com/.
Carefully follow the installation instructions and choose the
partitioning method "Use entire disk and set up encrypted LVM" for
maximum security. At the "Set up users and passwords" prompt, supply
an empty password for the root user and create an initial user
account. This account will be given the power to become root using the
sudo command. One day, I will add a Debian
Preseed to this
repository which will make all this happen automatically.
At the end of the installation you'll see this:
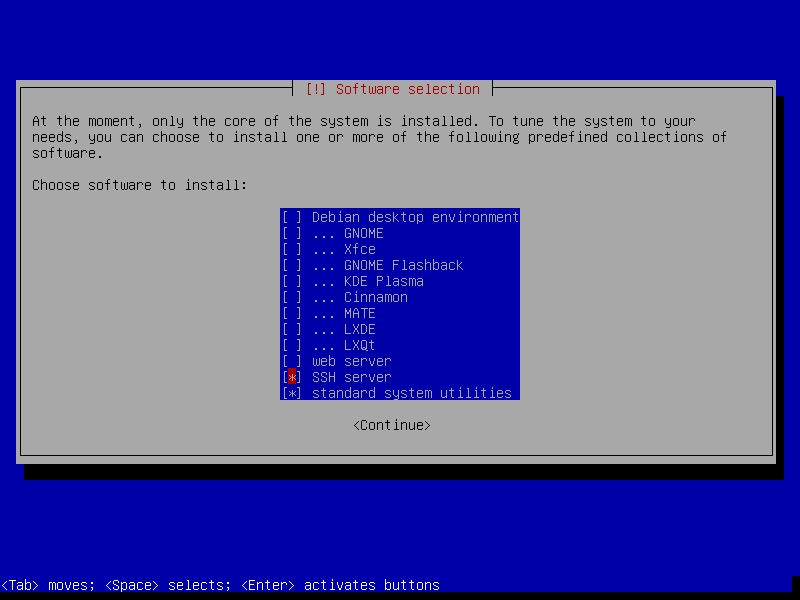
Select nothing except for "SSH Server" and "standard system utilities". After the installation is complete, boot into the new system and log in using the username and password you have set during installation. There is no graphical environment, yet, but be patient because we'll configure the important things first.
Note
Even when you have configured a WiFi connection during the installation, the resulting system may not have WiFi.
One way to solve this is to boot the installer again and enter "Rescue mode", follow the steps to get a root shell, and install NetworkManager with
apt install network-manager.Then, remove the USB drive, reboot into your system and execute:
nmcli dev wifi connect <Your WiFi name> password <Your WiFi password>
The only program currently running on your fresh installation is SSH. Let's make sure it's running securely by logging in, configuring public/private key authentication, and disabling password authentication, Once you've accomplished that, you will have remote access with sudo powers, which is all that is needed to take full control over your computer.
On the host computer, run:
$ sudo apt install libnss-mdns
On the host computer or on another computer, if you have one, run:
$ ssh-copy-id <hostname>.local
Finally, on the host computer, run:
$ sudoedit /etc/ssh/sshd
And change the line containing PasswordAuthentication to:
PasswordAuthentication no
To make the remaining steps a little easier, give yourself passwordless sudo access by running:
$ sudo visudo
And change the line containing %sudo to:
%sudo ALL=(ALL:ALL) NOPASSWD:ALL
Not coincidentally, this is everything that's required to run the Ansible playbook from this repository, which will completely set up the system for general use.
On either the host computer or on another computer with SSH access to the host computer, install Git and Ansible and clone this repository:
$ sudo apt install git ansible
$ git clone https://github.com/rtts/debian
$ cd debian
The playbook is divided into a number of hosts, with each host having
a number of roles. The roles are meant to be composable, so you can
easily choose to, for example, configure a host with the common and
X roles, but not with the workstation role. I personally use that
combination for computers that are being used as kiosks in various
locations, such as a copy shop and a museum. Another useful
combination is common, database, and webserver for the VPS that
serves my personal home page. That is the
power of using a single source of configuration for all your
computers!
For now, however, let's assume you are setting up a personal computer
that is in your physical possesion, such as a laptop or a desktop
computer. Open the file inventory.ini and add your hostname to the
[workstations] section and, if it's a laptop, to the [laptops]
section. If you want the system to be able to send and receive email,
please also provide your email credentials (optional). I highly recommend
Fastmail as an email provider using their
app passwords.
Now run the playbook!
$ ./playbook.yml
Congratulations! Your system has been fully set up for general use,
with a number of useful software packages installed and thousands more
just one apt install away. Let me guide you to how to use this setup
and how to customize it to your wishes.
After the system boots, you will be greeted with the following message of the day:

This message is shown in the blazingly fast terminal emulator
rxvt-unicode
displayed by the tiling window manager xmonad.
A single terminal is automatically launched at startup, because I like
it that way, but you can easily specify another program to launch by
editing the .xsession file in your home directory. Also have look at
the other dotfiles that were placed there by the playbook.
Note
All dotfiles (except
.bashrc) are placed by Ansible with the force parameter set tofalse, which means that your local changes will not be overwritten when you re-run the playbook. The dotfiles are also written to the/etc/skeldirectory, so they will be installed for new users created byadduser. This is also a convenient location to check for updates to dotfiles.
Here are the most important keyboard shortcuts you need to know:
WindowsShiftEnteropens a new terminal.Windows[1-9]switches to the virtual desktop 1 through 9.WindowsPlaunchesdmenu. Type the starting letters of a graphical program, such aschromiumorfirefoxand press Enter to launch it.WindowsTabcycles between the windows on the current virtual desktop.WindowsSpaceswitches between fullscreen and tiled window layouts.WindowsEntermoves a window to the top of the window stack.- When in tiled layout,
Windows,andWindows.do something that's hard to explain, but is usually exactly what you need. - To change the size of tiled windows,
WindowsHandWindowsLYou can also change the size of any window by holdingWindowsand drag it using the right mouse button. - Dragging a window while holding the
Windowskey will make it floating. You can make it tiled again withWindowsT.
You can view all available keybindings with Windows Shift /.
In no particular order, here are some things that you can do using this setup.
The playbook has installed the web browsers Chromium and Firefox.
Personally, I like to edit /etc/chromium.d/default-flags to add the
--incognito flag so that Chromium will always browse incognito, and
then use Firefox for all my non-incognito browsing.
Both browsers include uBlock Origin through the webext-ublock-origin-*
Debian packages. I have also heard good things about the
Firefox Multi-Account Containers
extension so you might want to give that a try. The recently introduced
Total Cookie Protection
sounds very promising.
Finally, I highly recommend setting your default search engine to
DuckDuckGo so you have access to their incredible Bang
syntax. In practice, however, most of my
web searches still use the !g bang to search Google.
Email configuration is split up into two roles:
mailservermailclient
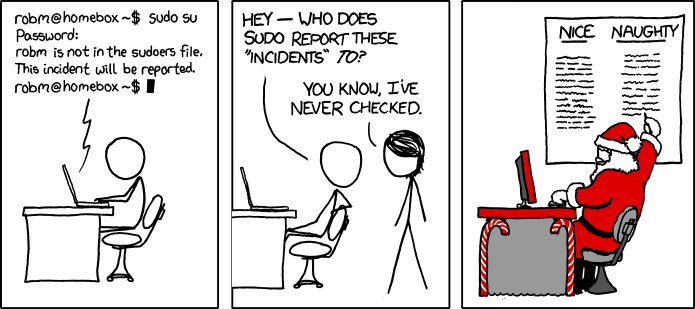
The mailserver role configures Exim4 to send all outgoing emails
through a smarthost of your choosing, solving the mystery of xkcd
838:
The mailclient role installs mutt for a
single user only, assuming that user is you. Launch it by typing
mutt at the command line and be amazed at the usability of it. It
has a lengthy manual, but for basic
usage all you need is the arrow keys and the following shortcuts:
m: Send new emailr: Reply to the current emailt: Mark the current email for deletion/archivald: Delete the marked emailsA: Archive the marked emails
I use LDCad to create building
instructions for my Lego models. It's
closed-source, but I've emailed the author and he's assured me he
would open source it before his death. You can also install leocad
and ldraw-parts from the Debian repositories. For more information
visit LDraw.org.
As a photographer I like to use Geeqie
(apt install geeqie) to cull the photos after a shoot, then use
darktable (apt install darktable)
to post-process them. Finally, I use
Photog! (pip install photog)
to generate my photography website.
Of course, GIMP and Inkscape cannot be missing in any designer's
toolbox and are therefore already installed by the Xworkstation
role.
I use Audacity (apt install audacity) to record high-quality audio using a Focusrite Scarlet 2i2,
which works phenomenally well under Linux and PulseAudio. All I needed
to do was plug the device in and attach speakers, and all audio was
routed correctly by default.
The terminal-first computing environment configured by this playbook
naturally lends itself well to all kinds of programming. Recommended
languages to get started are Bash, Python, Perl, Ruby, Haskell (I dare
you to edit the xmonad configuration file!), or PHP.
I love mpv so much it's included in the X role by
default. Read man mpv to find out all the available options of this
grand successor to mplayer. Unfortunately, it is currently not easy
to legally acquire stuff to play with mpv, unless you resort to
semi-legal options like
youtube-dl (apt install youtube-dl) or illegal options like Yify. Netflix runs in Firefox
after enabling DRM
but not in Chromium, because it lacks the required Widevine DRM.
Please fight for alternatives to
DRM.
If you're a gamer, you probably want to install the Steam Client even though it's not open source. Personally I like playing titles that are available on the Internet Archive, using my own custom games launcher for DOSBox that will automatically download and run a large number of MS-DOS games. Here's how to install and run it:
$ sudo apt install dosbox
$ pip install ialauncher
$ ialauncher --no-fullscreen
The --no-fullscreen argument is there because xmonad will already
tile the IA Launcher window to be fullscreen. Alternatively, you can
add your computer to the gamestations group to configure it to run
IA Launcher as a window manager, but that is not recommended unless
you plan to use the computer for nothing else but retro gaming. (I've
used this role to exhibit games in a public library, the guests loved
it!)
To satisfy my employer's ISO 27001 requirement, the screens of all
workstations are set to lock after 15 minutes of inactivity. To
accomplish this, I used xautolock which is officially hosted by one
of the first web sites on the
internet:
http://sunsite.unc.edu/pub/Linux/X11/screensavers/. To get rid of
the auto-locking behavior, remove the file
/etc/X11/Xsession.d/90custom_autolock and restart X with Windows
Shift Q.
It's possible to configure mutt to connect to an Exchange server, but according to the linked blog:
get yourself a beer, this will probably take a couple of hours to set up
Like any operating system, Debian publishes regular updates. Make it a habit to run the following commands regularly:
$ sudo apt update
$ sudo apt upgrade