DanmakuKit(简体中文)
DanmakuKit is a high performance library that provides the basic functions of danmaku. It provides a set of processes that allow you to generate the danmaku cell via cellModel, and each danmaku can be drawn either synchronously or asynchronously.
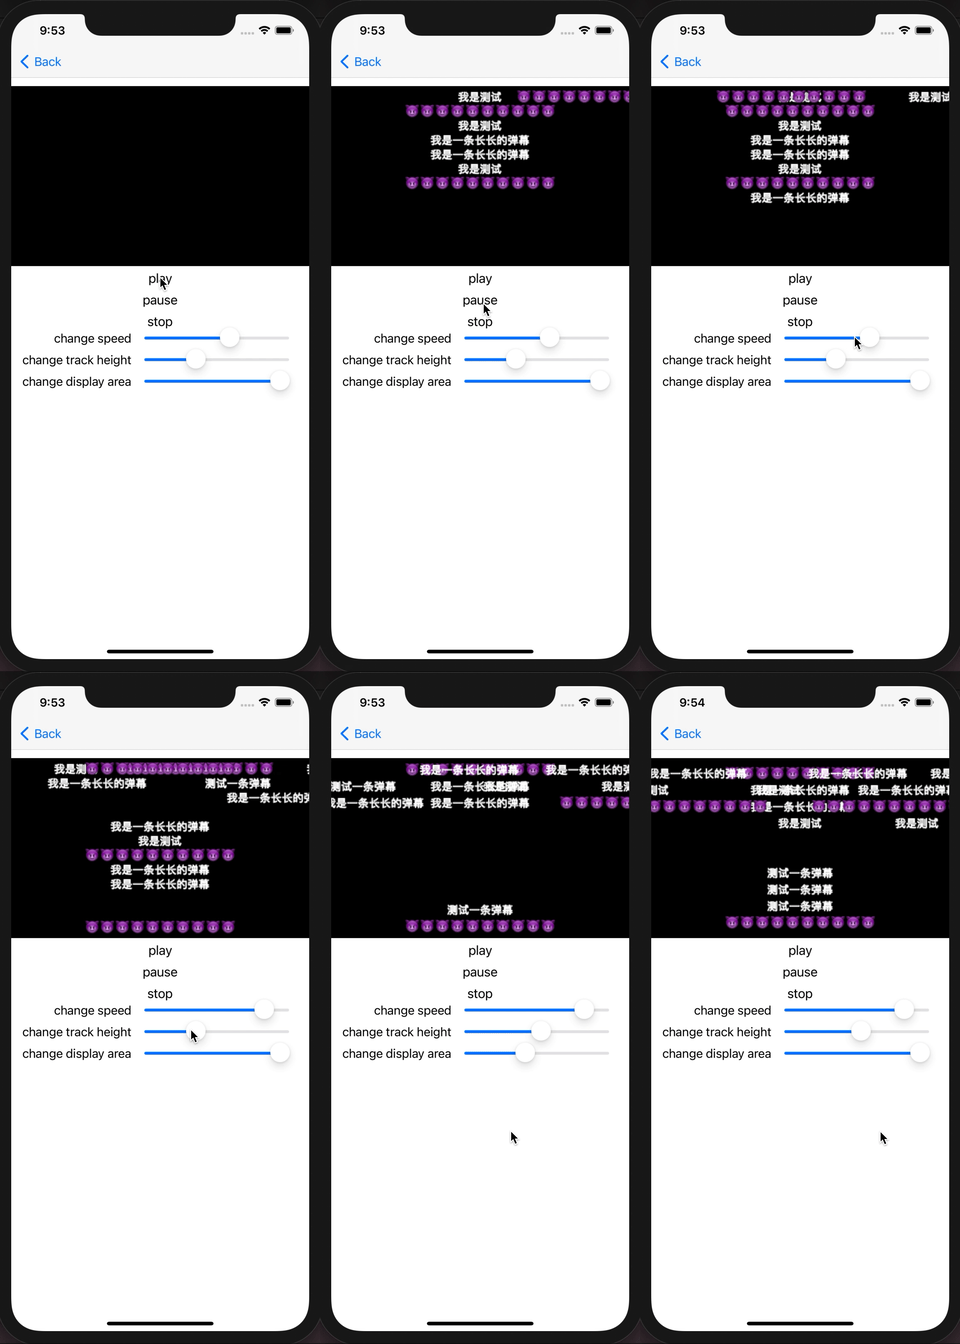
As shown in the GIF below, DanmakuKit offers three types of danmaku launch: floating, top and bottom.
- Speed adjustment
- Track height adjustment
- Display area adjustment
- Click callback
- Support to pause or play a single danmaku
- Provides property to specify whether danmaku can overlap
- Support to disable danmaku for different types of tracks
- Support for setting progress property to render the danmaku immediately on the view
- Support to clean up all danmaku
- Support Gif Danmaku
- SwiftUI
- Implement a model to inherit from the DanmakuCellModel. In this model you need to add your own properties and methods to draw the danmaku.
class DanmakuTextCellModel: DanmakuCellModel {
    var identifier = ""

    var text = ""

    var font = UIFont.systemFont(ofSize: 15)

    var offsetTime: TimeInterval = 0

    var cellClass: DanmakuCell.Type {
        return DanmakuTextCell.self
    }

    var size: CGSize = .zero

    var track: UInt?

    var displayTime: Double = 8

    var type: DanmakuCellType = .floating

    var isPause = false

    func calculateSize() {
        size = NSString(string: text).boundingRect(with: CGSize(width: CGFloat(Float.infinity
            ), height: 20), options: [.usesFontLeading, .usesLineFragmentOrigin], attributes: [.font: font], context: nil).size
    }

    func isEqual(to cellModel: DanmakuCellModel) -> Bool {
        return identifier == cellModel.identifier
    }
}- Implement a View inherited from DanmakuCell. Then you need to override the
displayingmethod, and use CGContext draw your danmaku. It is important to note when calldisplayingmethod was not in the main thread, so you need to consider multithreading.
class DanmakuTextCell: DanmakuCell {
    required init(frame: CGRect) {
        super.init(frame: frame)
        backgroundColor = .clear
    }

    required init?(coder: NSCoder) {
        fatalError("init(coder:) has not been implemented")
    }

    override func displaying(_ context: CGContext, _ size: CGSize, _ isCancelled: Bool) {
        guard let model = model as? DanmakuTextCellModel else { return }
        let text = NSString(string: model.text)
        context.setLineWidth(1)
        context.setLineJoin(.round)
        context.setStrokeColor(UIColor.white.cgColor)
        context.saveGState()
        context.setTextDrawingMode(.stroke)
        let attributes: [NSAttributedString.Key: Any] = [.font: model.font, .foregroundColor: UIColor.white]
        text.draw(at: .zero, withAttributes: attributes)
        context.restoreGState()
        context.setTextDrawingMode(.fill)
        text.draw(at: .zero, withAttributes: attributes)
    }
}- Pass the DanmakuCellModel to the DanmakuView to display danmaku.
let danmakuView = DanmakuView(frame: CGRect(x: 0, y: 0, width: 350, height: 250))
view.addSubview(danmakuView)
let cellModel = DanmakuTextCellModel(json: nil)
cellModel.displayTime = displayTime
cellModel.text = contents[index]
cellModel.identifier = String(arc4random())
cellModel.calculateSize()
cellModel.type = .floating
danmakuView.shoot(danmaku: cellModel)Call play() method to start display danmaku.
danmakuView.play()Call pause() method to pause the play of danmaku.
danmakuView.pause()Call stop() method to stop display danmaku and clean up resource. The memory associated with DanmakuKit is not cleaned up until this method is called. This method will be invoked when DanmakuView destroyed.
danmakuView.stop()If you want to display GIF on a danmaku, then import the Gif subspec and use the DanmakuGifCell and DanmakuGifCellModel.
See the Example project for more features.
swift 5.0+
iOS 10.0+, SwiftUI iOS 14.0+
DanmakuKit is available through CocoaPods. To install it, simply add the following line to your Podfile:
pod 'DanmakuKit', '~> 1.5.0'DanmakuKit is also available through Swift Package Manager. To install it, simply add the dependency to your Package.Swift file:
dependencies: [
    .package(url: "https://github.com/qyz777/DanmakuKit.git", from: "1.5.0"),
],
targets: [
    .target( name: "YourTarget", dependencies: ["DanmakuKit"]),
]
DanmakuKit is available under the MIT license. See the LICENSE file for more info.


