
![]()

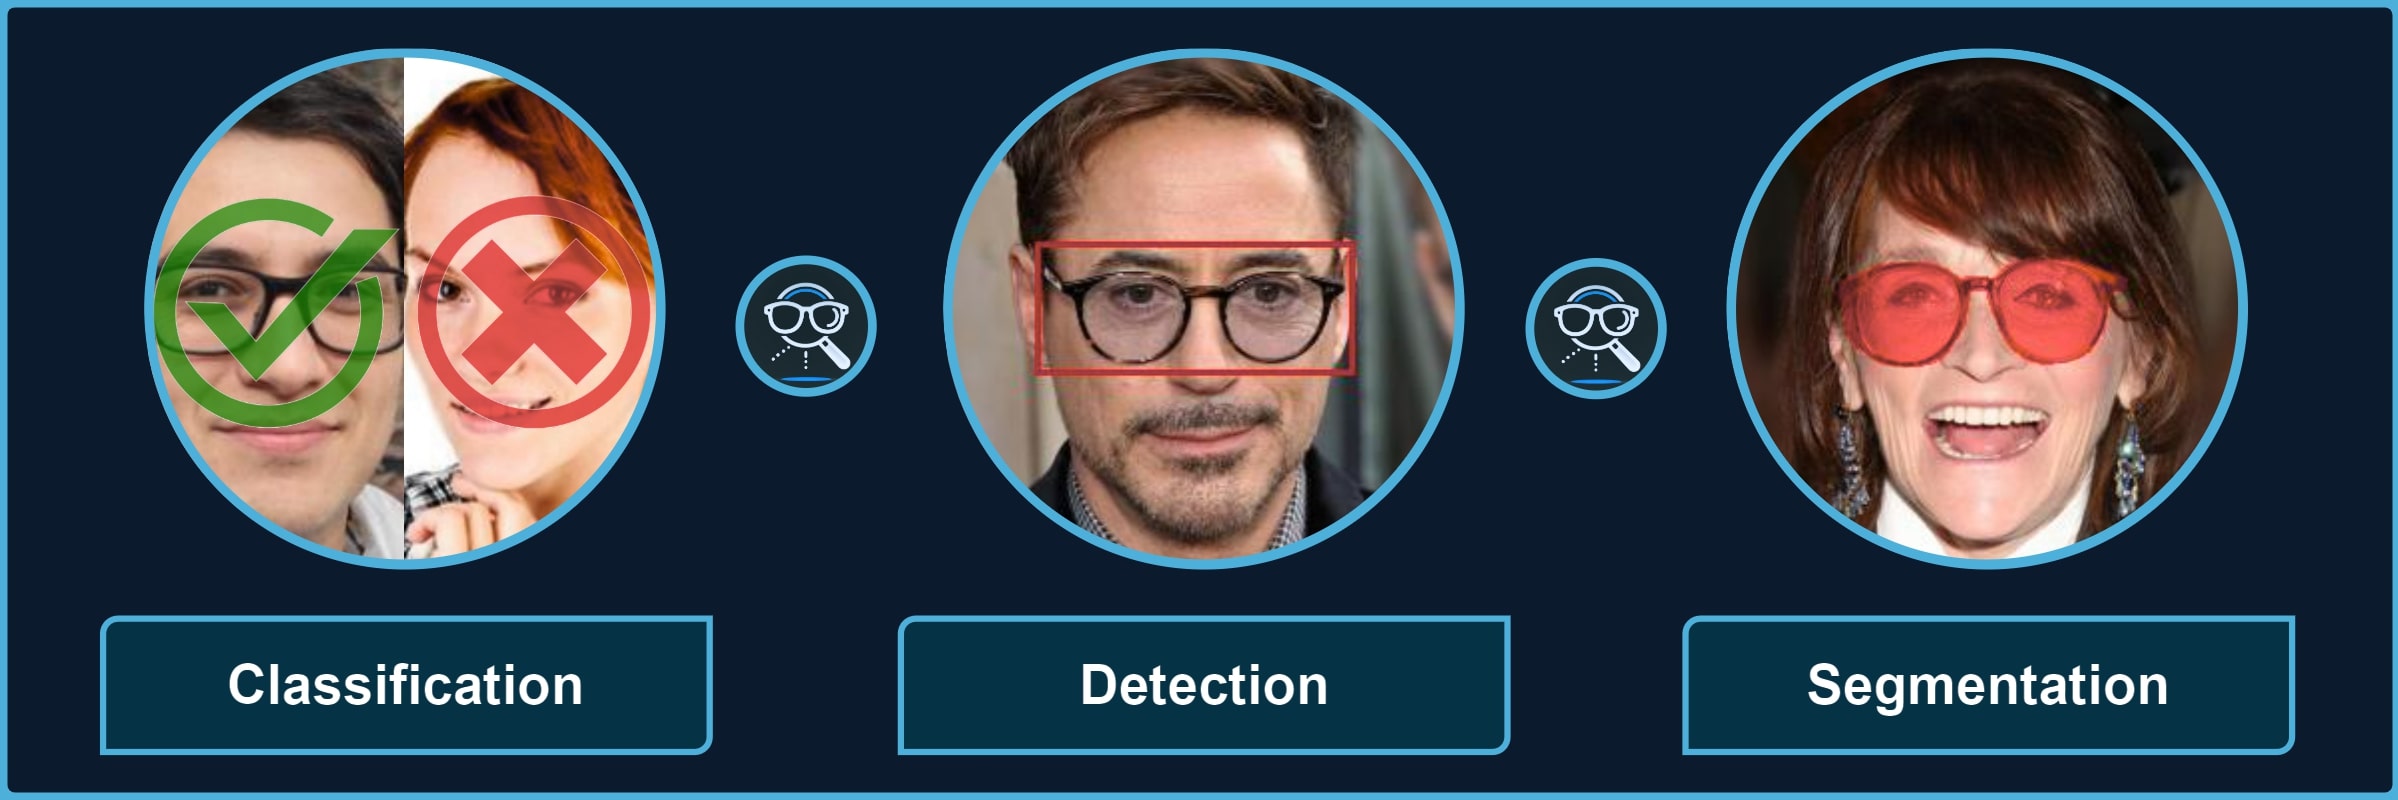
Package for processing images with different types of glasses and their parts. It provides a quick way to use the pre-trained models for 3 kinds of tasks, each divided into multiple categories, for instance, classification of sunglasses or segmentation of glasses frames.
| Classification | 👓 transparent 🕶️ opaque 🥽 any ➿shadows |
| Detection | 🤓 worn 👓 standalone 👀 eye-area |
| Segmentation | 😎 full 🖼️ frames 🦿 legs 🔍 lenses 👥 shadows |
Important
Minimum version of Python 3.12 is required. Also, you may want to install Pytorch (select Nightly for compatibility) in advance to select specific configuration for your device and environment.
If you only need the library with pre-trained models, just install the pip package and see Quick Start for usage (also check Glasses Detector Installation for more details):
pip install glasses-detectorYou can also install it from the source:
git clone https://github.com/mantasu/glasses-detector
cd glasses-detector && pip install .If you want to train your own models on the given datasets (or on some other datasets), just clone the project and install training requirements, then see Running section to see how to run training and testing.
git clone https://github.com/mantasu/glasses-detector
cd glasses-detector && pip install -r requirements.txt
You can create a virtual environment for your packages via venv, however, if you have conda, then you can simply use it to create a new environment, for example:
conda create -n glasses-detector python=3.12
conda activate glasses-detector
To set-up the datasets, refer to Data section.
You can run predictions via the command line. For example, classification of a single image and segmentation of images inside a directory can be performed by running:
glasses-detector -i path/to/img.jpg -t classification -d cuda -f int # Prints 1 or 0
glasses-detector -i path/to/img_dir -t segmentation -f mask -e .jpg  # Generates masks
Tip
You can also specify things like --output-path, --size, --batch-size etc. Check the Glasses Detector CLI and Command Line Examples for more details.
You can import the package and its models via the python script for more flexibility. Here is an example of how to classify people wearing sunglasses:
from glasses_detector import GlassesClassifier

# Generates a CSV with each line "<img_name.jpg>,<True|False>"
classifier = GlassesClassifier(size="small", kind="sunglasses")
classifier.process_dir("path/to/dir", "path/to/preds.csv", format="bool")
And here is a more efficient way to process a dir for detection task (only single bbox per image is currently supported):
from glasses_detector import GlassesDetector

# Generates dir_preds with bboxes as .txt for each img
detector = GlassesDetector(kind="eyes", device="cuda")
detector.process_dir("path/to/dir", ext=".txt", batch_size=64)
Tip
Again, there are a lot more things that can be specified, for instance, output_size and pbar. It is also possible to directly output the results or save them in a variable. See Glasses Detector API and Python Script Examples for more details.
Feel free to play around with some demo image files. For example, after installing through pip, you can run:
git clone https://github.com/mantasu/glasses-detector && cd glasses-detector/data
glasses-detector -i demo -o demo_labels.csv --task classification:eyeglasses
You can also check out the demo notebook which can be also accessed via Google Colab.
Before downloading the datasets, please install unrar package, for example if you're using Ubuntu (if you're using Windows, just install WinRAR):
sudo apt-get install unrarAlso, ensure the scripts are executable:
chmod +x scripts/*Once you download all the datasets (or some that interest you), process them:
python scripts/preprocess.py --root data -f -dTip
You can also specify only certain tasks, e.g., --tasks classification segmentation would ignore detection datasets. It is also possible to change image size and val/test split fractions: use --help to see all the available CLI options.
After processing all the datasets, your data directory should have the following structure:
└── data                    # The data directory (root) under project
    ├── classification
    │   ├── anyglasses      # Datasets with any glasses as positives
    │   ├── eyeglasses      # Datasets with transparent glasses as positives
    │   ├── shadows         # Datasets with visible glasses frames shadows as positives
    │   └── sunglasses      # Datasets with semi-transparent/opaque glasses as positives
    │
    ├── detection
    │   ├── eyes            # Datasets with bounding boxes for eye area
    │   ├── solo            # Datasets with bounding boxes for standalone glasses
    │   └── worn            # Datasets with bounding boxes for worn glasses
    │
    └── segmentation
        ├── frames          # Datasets with masks for glasses frames
        ├── full            # Datasets with masks for full glasses (frames + lenses)
        ├── legs            # Datasets with masks for glasses legs (part of frames)
        ├── lenses          # Datasets with masks for glasses lenses
        ├── shadows         # Datasets with masks for eyeglasses frames cast shadows
        └── smart           # Datasets with masks for glasses frames and lenses if opaque
Almost every dataset will have train, val and test sub-directories. These splits for classification datasets are further divided to <category> and no_<category>, for detection - to images and annotations, and for segmentation - to images and masks sub-sub-directories. By default, all the images are 256x256.
Note
Instead of downloading the datasets manually one-by-one, here is a Kaggle Dataset that you could download which already contains everything.
Download Instructions
Download the following files and place them all inside the cloned project under directory data which will be your data --root (please note for some datasets you need to have created a free Kaggle account):
Classification datasets:
- From CMU Face Images download
cmu+face+images.zip - From Specs on Faces download
original images.rarandmetadata.rar - From Sunglasses / No Sunglasses download
archive.zipand rename tosunglasses-no-sunglasses.zip - From Glasses and Coverings download
archive.zipand rename toglasses-and-coverings.zip - From Face Attributes Grouped download
archive.zipand rename toface-attributes-grouped.zip - From Face Attributes Extra download
archive.zipand rename toface-attributes-extra.zip - From Glasses No Glasses download
archive.zipand rename toglasses-no-glasses.zip - From Indian Facial Database download
An Indian facial database highlighting the Spectacle.zip - From Face Attribute 2 download
FaceAttribute 2.v2i.multiclass.zip(choosev2andMulti Label Classificationformat) - From Glasses Shadows Synthetic download
archive.zipand rename toglasses-shadows-synthetic.zip
Detection datasets:
- From AI Pass download
AI-Pass.v6i.coco.zip(choosev6andCOCOformat) - From PEX5 download
PEX5.v4i.coco.zip(choosev4andCOCOformat) - From Sunglasses Glasses Detect download
sunglasses_glasses_detect.v1i.coco.zip(choosev1andCOCOformat) - From Glasses Detection download
Glasses Detection.v2i.coco.zip(choosev2andCOCOformat) - From Glasses Image Dataset download
glasses.v1-glasses_2022-04-01-8-12pm.coco.zip(choosev1andCOCOformat) - From EX07 download
Ex07.v1i.coco.zip(choosev1andCOCOformat) - From No Eyeglass download
no eyeglass.v3i.coco.zip(choosev3andCOCOformat) - From Kacamata-Membaca download
Kacamata-Membaca.v1i.coco.zip(choosev1andCOCOformat) - From Only Glasses download
onlyglasses.v1i.coco.zip(choosev1andCOCOformat)
Segmentation datasets:
- From CelebA Mask HQ download
CelebAMask-HQ.zipand from CelebA Annotations downloadannotations.zip - From Glasses Segmentation Synthetic Dataset download
archive.zipand rename toglasses-segmentation-synthetic.zip - From Face Synthetics Glasses download
archive.zipand rename toface-synthetics-glasses.zip - From Eyeglass download
eyeglass.v10i.coco-segmentation.zip(choosev10andCOCO Segmentationformat) - From Glasses Lenses Segmentation download
glasses lenses segmentation.v7-sh-improvments-version.coco.zip(choosev7andCOCOformat) - From Glasses Lens download
glasses lens.v6i.coco-segmentation.zip(choosev6andCOCO Segmentationformat) - From Glasses Segmentation Cropped Faces download
glasses segmentation cropped faces.v2-segmentation_models_pytorch-s_1st_version.coco-segmentation.zip(choosev2andCOCO Segmentationformat) - From Spects Segmentation download
Spects Segementation.v3i.coco-segmentation.zip(choosev3andCOCO Segmentation) - From KINH download
kinh.v1i.coco.zip(choosev1andCOCOformat) - From Capstone Mini 2 download
CAPSTONE_MINI_2.v1i.coco-segmentation.zip(choosev1andCOCO Segmentationformat) - From Sunglasses Color Detection download
Sunglasses Color detection roboflow.v2i.coco-segmentation.zip(choosev2andCOCO Segmentationformat) - From Sunglasses Color Detection 2 download
Sunglasses Color detection 2.v3i.coco-segmentation.zip(choosev3andCOCO Segmentationformat) - From Glass Color download
Glass-Color.v1i.coco-segmentation.zip(choosev1andCOCO Segmentationformat)
The table below shows which datasets are used for which tasks and their categories. Feel free to pick only the ones that interest you.
| Task | Category | Dataset IDs |
|---|---|---|
| Classification | anyglasses |
1, 3, 4, 5, 6, 7, 8, 9, 14, 15, 16 |
| Classification | eyeglasses |
2, 4, 5, 6, 11, 12, 13, 14, 15 |
| Classification | sunglasses |
1, 2, 3, 4, 5, 6, 11, 12, 13, 14, 15 |
| Classification | shadows |
10 |
| Detection | eyes |
14, 15, 16, 17 |
| Detection | solo |
18, 19 |
| Detection | worn |
11, 12, 13, 14, 15, 16 |
| Segmentation | frames |
21, 23 |
| Segmentation | full |
20, 27, 28 |
| Segmentation | legs |
29, 30, 31 |
| Segmentation | lenses |
23, 24, 25, 26, 30, 31, 32 |
| Segmentation | shadows |
21 |
| Segmentation | smart |
22 |
To run custom training and testing, it is first advised to familiarize with how Pytorch Lightning works and briefly check its CLI documentation. In particular, take into account what arguments are accepted by the Trainer class and how to customize your own optimizer and scheduler via command line. Prerequisites:
- Clone the repository
- Install the requirements
- Download and preprocess the data
You can run simple training as follows (which is the default):
python scripts/run.py fit --task classification:anyglasses --size medium You can customize things like batch-size, num-workers, as well as trainer and checkpoint arguments:
python scripts/run.py fit --batch-size 64 --trainer.max_epochs 300 --checkpoint.dirname ckptIt is also possible to overwrite default optimizer and scheduler:
python scripts/run.py fit --optimizer Adam --optimizer.lr 1e-3 --lr_scheduler CosineAnnealingLRTo run testing, specify the trained model and the checkpoint to it:
python scripts/run.py test -t classification:anyglasses -s small --ckpt_path path/to/model.ckptOr you can also specify the pth file to pre-load the model with weights:
python scripts/run.py test -t classification:anyglasses -s small -w path/to/weights.pthIf you get UserWarning: No positive samples in targets, true positive value should be meaningless, increase the batch size.
For references and citation, please see Glasses Detector Credits.