Set of 3 docker containers + control script to provide easy setup of nginx + v2ray (vmess-ws-tls) proxy on vps (tested on UBUNTU only).
Server will redirect all requests to your domain to the site you like, except websocket requests to one path specified in config.
Repo presents:
- nginx-proxy container which will receive all requests on your vps 80/443 ports
- nginx-proxy-acme container which is in charge of issuing certificates for any deployed container + auto renewing them
- nginx-v2ray container which is the main deal here
Run start.sh
- You should own a domain, which has A record pointing to your vps ip (todo: add info how to do it)
- On your vps with Ubuntu system install git and docker (commands from official site, pick by your own if need) docker | git
sudo apt install git-all

sudo apt remove docker docker-engine docker.io containerd runc
sudo apt update
sudo apt install ca-certificates curl gnupg lsb-release
sudo mkdir -p /etc/apt/keyrings
curl -fsSL https://download.docker.com/linux/ubuntu/gpg | sudo gpg --dearmor -o /etc/apt/keyrings/docker.gpg
echo \
  "deb [arch=$(dpkg --print-architecture) signed-by=/etc/apt/keyrings/docker.gpg] https://download.docker.com/linux/ubuntu \
  $(lsb_release -cs) stable" | sudo tee /etc/apt/sources.list.d/docker.list > /dev/null
sudo apt update
sudo apt install docker-ce docker-ce-cli containerd.io docker-compose-plugin
- Stop apache on your server, it takes port 80 which prevents nginx as intended.
sudo systemctl disable apache2
sudo systemctl stop apache2
- Clone this repo
git clone https://github.com/SanariSan/v2ray-ws-tls - Cd into directory
cd v2ray-ws-tls - Make script executable
chmod 755 ./start.sh - Rename .env.copy to .env and replace values with your own, use nano or other editor
nano ./.env - Run script with
/bin/bash ./start.sh
If placing several UUIDs, then split each with ; as shown in the example config
To create uuid run uuid -v4 or go to any generator
- Main menu
- Press 4) and check if all values filled correctly
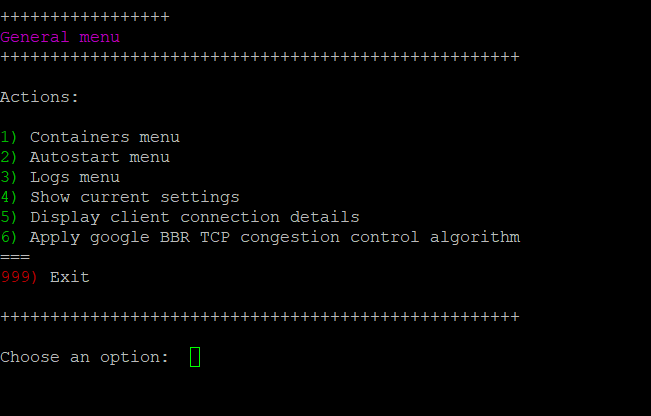
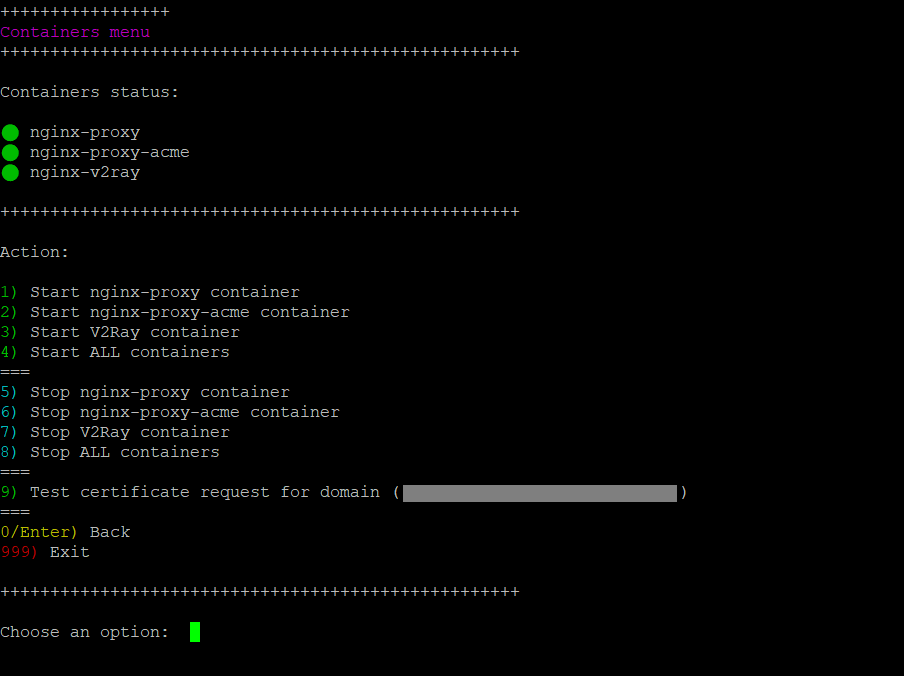
- Proceed to 1) section (containers) and run test certificate request (it's dry run, no cert generated)
- If that went fine start all the containers
- Make sure all containers up and running, you will see green circles
- Get back to main menu and press 5) to display settings for connecting to your server. Content of this file should be moved to your home pc v2ray. The file itself located in
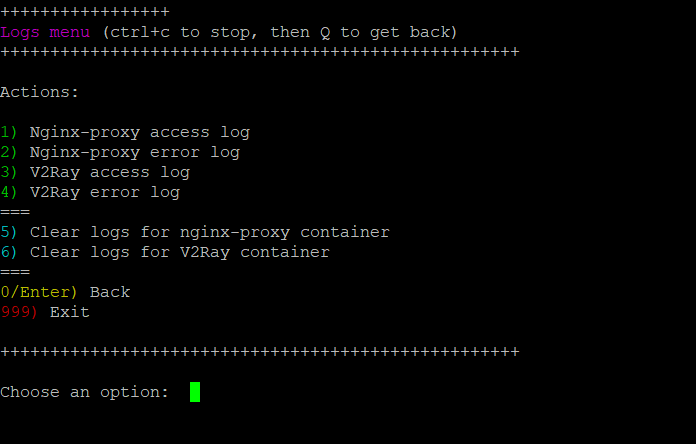
./clientdirectory near. - Check out Logs in section 3) if need to.
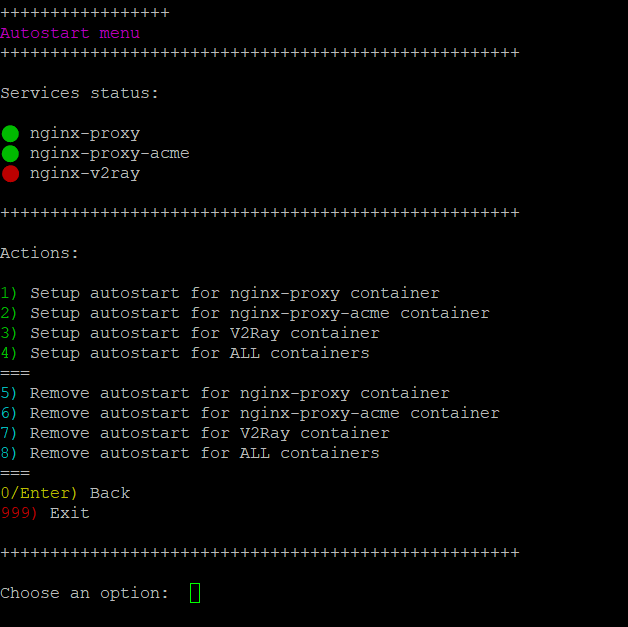
- If you wish to enable autostart on boot proceed to 2) section.
- To enable BBR optimisation proceed to option 6).
Project uses nginx-proxy and acme-companion containers. To make them work not only within this project, but also for proxying other projects, I assigned network inbound to both containers. Left more info about that here.
Use if you want to generate UUIDs from recognizable strings, for example "user1", "myid123", etc.
- First create private key (normal random uuid), for example here or with
uuid -v4, write it down. - Go to
about:blankin your browser (for example) and paste code fromgenerate-uuids.js. - Put generated UUID as private key, then enter desired words as keywords. Script will output matching UUIDs for each word. You can generate same UUIDs later from same words using private key, don't lose it.