
Udacity Self-Driving Car Engineer Nanodegree Program
Version: 1.0
Date: 01 Aug 2018
- Team
- Abstract
- Submission checklist
- Required set-up
- Drive-by-wire controls
- Waypoint processing
- Training image capture
- Image classifier and results: Faster R-CNN
- Image classifier and results: VGG
- Summary
| Name | Responsibilities | |
|---|---|---|
| Sergey Iakovlev | [email protected] | Team lead/Faster R-CNN classifier |
| Tatsuya Hatanaka | [email protected] | Data preparation, Smooth braking |
| Swapan Shridhar | [email protected] | Twist Controller, car wobbling issues, logo |
| Anthony T Tran | [email protected] | Collecting Images for training Classifier/Testing |
| Charlie Wartnaby | [email protected] | Auto simulation training image capture/VGG classifier |
This is the repository of Smart Carla team for the final project of the Udacity Self-Driving Car Nanodegree in which we programed a real self-driving car's perception, control and path planning modules. The diagram below shows the details:

The goal of the project was to get Udacity's self-driving car to drive around a test track and stop at traffic lights.
The starting code has been taken from Udacity's github repository here.
This section describes how each of the required checklist items have been met for project submission.
-
Launch correctly using the launch files provided in the capstone repo The project code was tested on several machines running under different operating systems (Ubuntu and Mac OS).
-
Smoothly follow waypoints in the simulator This is achieved by tweaking parameters in
pure_pursuit_core.hfile. The details are discussed in waypoint processing. -
Respect the target top speed set for the waypoints This is was achieved by using PID contoroller and tuning its parameters. Please refer to drive-by-wire controls for details.
-
Stop at traffic lights when needed To get this working we implemented two different classifiers. This is discussed in sections Image classifier and results: Faster R-CNN and Image classifier and results: VGG.
-
Stop and restart PID controllers depending on the state of /vehicle/dbw_enabled This feature is working and implementation details are discussed in Drive-by-wire controls section.
-
Publish throttle, steering, and brake commands at 50 Hz This is implemented in
dbw_node.py(lines 101-116):
   def loop(self):
        rate = rospy.Rate(50) # 50Hz
        while not rospy.is_shutdown():

            # Get predicted throttle, brake, and steering using `twist_controller`
            if not None in (self.ref_v, self.cur_v, self.ref_yaw):
                self.throttle, self.brake, self.steering = self.controller.control(
                    self.ref_v,
                    self.ref_yaw,
                    self.cur_v,
                    self.dbw_enabled)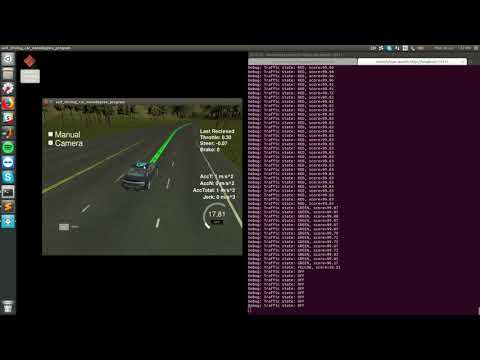
...- Test it out using ROS bags that were recorded at the test site The video in the Image classifier and results: Faster R-CNN section shows our test results.
As required by Udacity, no additional Python packages or other libraries are required to
run the software. The list of packages installed by the provided requirements.txt (but with
tensorflow-gpu instead of tensorflow) is adequate.
The light classifier has three possible settings. Each will cause the download of
one or more large pretrained neural network model files on first use, because those files were too large to
include in the GitHub repository. The possible settings in tl_classifier.py are:
| Options | Description |
|---|---|
self.classifier = "FRCNN", self.is_site = False |
Default: F-R-CNN, for simulator use |
self.classifier = "FRCNN", self.is_site = True |
F-R-CNN, for vehicle/real image use |
self.classifier = "VGG" |
VGG, for simulator use only (less good, see notes below) |
This initial download may cause the tl_detector process (which imports tl_classifier) to
time out the ROS launch overall. For the VGG case, you can execute
ros/run_this_first_to_download_big_model_files.sh first to avoid this ROS timeout.
Note. When running the code for the first time with self.classifier = "FRCNN" the corresponding model (either for self.is_site = False or self.is_site = True) will be downloaded.
Inputs: Subscribes to /current_velocity, /twist_cmd and /vehicle/dbw_enabled topics.
Outputs: Checks for dbw_enabled == True and publishes throttle, brake and steer topic values at 50 Hz.
Publishing at 50 Hz is important as simulator may complain if we go less than 50 Hz and will shutdown at ~30 Hz. This is a built-in safety feature and thereby returning control back to the driver.
Before we do any calculations for publishing, we do the following:
- Use
Low Pass Filterfor current velocity (cur_v) to filter out any high frequency noise in it. - Calculate velocity error (
error_v) based on reference (ref_v) and current (cur_v_filtered) velocity after filtering. - Calculate elapsed time (
sample_time) since last call.
We use Yaw controller initialized below to get the steering angle values with below params:
Path : src/twist_controller/twist_controller.py
....
self.yaw_controller = YawController(wheel_base, steer_ratio, 0.1, max_lat_accel, max_steer_angle)
....
Brake values are published in torque units (N*m). The brake value can be computed using the desired acceleration, weight of the vehicle, and wheel radius, depending on the cases mentioned below.
Throttle is a proportional value unlike brake or steering and is in the range of 0 to 1. We use PID controller for throttle which uses error_v and sample_time as follows:
Path : src/twist_controller/twist_controller.py
....
throttle = self.throttle_controller.step(error_v, sample_time)
....
Brake and throttle are interdependent and effect each other as follows:
Path : src/twist_controller/twist_controller.py
	# 3) Brake calculation
        brake = 0.0
        if ref_v == 0.0 and cur_v_filtered < 0.1:
        	# car is about to brake
        	throttle = 0
        	brake = 400
        elif throttle < 0.01 and error_v < 0.0:
        	throttle = 0
        	decel = min(error_v, self.decel_limit)
        	brake = abs(decel) * self.vehicle_mass * self.wheel_radius;
....- If target linear velocity (
ref_v) is 0 and our current velocity (cur_v_filtered< 0.1) is less than minimum that we can have (implies that we need to stop immediately), we setthrottleandbraketo0and400(max) respectively. - Otherwise, if
throttlecalculated (<0.01) is very small and velocity error (error_v) is negative (implies we are going faster than we should be ideally), we setthrottleto 0, calculate deceleration (decel) value and use its absolute value along withvehicle_massandwheel_radiusto calculate the amount ofbraketo be applied at that point.
With (1). waypoints getting published and (2). PID controller publishing correct values for throttle, brake and steer, car still wandered a little bit within the lane. The is because of the Autoware code that we are using, as it doesn't recompute the trajectory until the car has passed a certain (A). Distance or (B). Angle away from the waypoints trajectory. Other attribution is to the simple PID controller used, where by the time it recomputes the trajectory and gives new twist command, car has already wandered a bit away from waypoints, and suddenly steers back to the waypoints to catchup.
Following was done to fix the above mentioned wandering issue:
A. Updated src/waypoint_follower/include/pure_pursuit_core.h params displacement_threshold, relative_angle_threshold to 0.1 and 1.0 respectively.
Path : src/waypoint_follower/include/pure_pursuit_core.h
....
public:
  PurePursuit(bool linear_interpolate_mode)
    ....
    , displacement_threshold_(0.1)
    , relative_angle_threshold_(1.)
    ....
This enables fine grained check in PurePursuit::verifyFollowing() to follow the waypoints.
Path : src/waypoint_follower/include/pure_pursuit_core.h
....
bool PurePursuit::verifyFollowing() const
{
  ....
  if (displacement < displacement_threshold_ && relative_angle < relative_angle_threshold_)
  {
    // ROS_INFO("Following : True");
    return true;
  }
  else
  {
    // ROS_INFO("Following : False");
    return false;
  }
}
....
B. Used current_velocity and min_speed to determine whether to update the steering angle in src/twist_controller/yaw_controller.py or not.
Path : src/twist_controller/yaw_controller.py
....
def get_steering(self, linear_velocity, angular_velocity, current_velocity):
   ....
   if current_velocity < self.min_speed:
       return 0.0
   else:
       return self.get_angle(max(current_velocity * 0.8, self.min_speed) / angular_velocity) if abs(angular_velocity) > 0. else 0.0;
....Automatic collection of images for classifier training purposes was added to tl_detector.py.
This collected images from the /image_color topic, either from the simulator (acting as a
virtual camera sensor), or from playing one of the Udacity-provided .bag files with real
images.
The images were captured if self.grab_training_images (normally False) was set True. The
files were automatically named and numbered (using self.training_image_idx). However, The
strategy for collecting simulator or real images then differed.
The end result was a collection of images named e.g. sim_123_0.jpg (for the 123rd simulator
image of state 0=RED) or real_124_2.jpg (for the 124th real image of state 2=GREEN). These
images could then be read into the training programs directly and the ground truth state
extracted easily from the filename suffix. The training images can be found in the
data/training_images* folders.
The simulator provided ground truth light states (colours) alongside the images, so
we wrote code in tl_detector.py to automatically name the saved image files with the
required ground-truth suffix number, requiring no manual work.
To collect a useful set of images without capturing near-identical images, or many images of light-free roads, logic was included as follows:
- Images were captured only if the car was within
self.sim_image_grab_max_rangemetres of a light, to avoid pictures of empty road. - Image capture stopped below
self.sim_image_grab_min_rangeof a light, assuming it would be passing out of the camera frame when very nearby. - Another image would not be captured if the car was still within
self.sim_image_grab_min_spacingmetres of the point at which the last image was captured.
The car was then allowed to drive round the circuit in simulation and images were
accumulated. 285 were collected initially in data/training_images; this was perfectly adequate for training
the classifiers, as the simulation images were relatively easy to identify by
a DL model.
Additional simulation images were later captured as data/training_images2.
All the real images were obtained from Udacity .bag files.
The first images were obtained by automatic saving in tl_detector.py from
traffic_light_training.bag (linked to in the start project repo README.md file).
However, these images were of poor quality, with excessive brightness and poor
colours. Even as a human it was difficult to distinguish the colour; in some cases
it could only be determined by looking at the reflection on the car bonnet (hood).
Also, the difficulty in training a classifier on these poor images meant that we
needed more pictures.
In the second step, we used the rviz ROS package. The following tutorial from ROS webpage
(http://wiki.ros.org/rosbag/Tutorials/Exporting%20image%20and%20video%20data)
describes how to create a new .launch file and automatically capture images. Furthermore
the file just_traffic_light.bag linked to on the project submission page of the
classroom was used, which proved to have better-quality images.
One way to build a classifier is to use a powerfull API from Tensorflow on Object Detection. It has many pre-trained networks that can be fine tuned using custom datasets. There are several good tutorials that cover main steps and were used by our team as references in this project:
As a pre-trained classifier, we chose the Faster R-CNN network (link) that incorporates a ResNet 101 pretrained model. It provides a good balance between speed and detection accuracy for small objects on the image. In particular, we did not choose SSD (Singe Shot Detector) network as it resizes any input image to 300x300 pixels and, therefore, the accuracy of detecting small objects is reduced. The summary of main speed characteristics for different object detectors can be found here.
Once the data was ready the following steps were taken to get classifier working:
- Follow installation instructions for object detection api: link
- Draw boxes and give a corresponding label (
red,yelloworgreen) for each image in the dataset. We used labelImg to do this. - Create
.pbtxtfile with labels data. Link to our.pbtxtfile. - Create
.recordfile. To do this we adopted code from the originalcreate_pascal_tf_record.py. The modified version of the script can be found here: tf_record_udacity.py. Usage example:python tf_record_udacity.py \ --data_dir=/home/user/data \ # dataset path --output_path=/home/user/udacity_data.record \ # output .record file path --label_map_path=/home/user/data/label_map.pbtxt # label .pbtxt file path - Configure the model parameters, trainig and validation setting using corresponding
.configfile, i.e. faster_rcnn_resnet101_udacity.config - Run
train.pyscript, specify model configuration file and output directory. Usage example:python train.py --logtostderr --train_dir=./models/train --pipeline_config_path=faster_rcnn_resnet101_udacity.config
- Run
export_inference_graph.pyscript, specify model configuration file, checkpoint file (.ckpt) and output directory for a frozen graph. Usage example:python export_inference_graph.py --input_type image_tensor \ --pipeline_config_path ./faster_rcnn_resnet101_udacity.config \ --trained_checkpoint_prefix ./models/train/model.ckpt-10000 \ --output_directory ./fine_tuned_model
- The flag
is_site(insidetl_classifier.pyline 16) is used for switching between two types of classifiers: one is based on simulator images and another is a real images classifier. - Once code is running the required model is automatically downloaded and configured. The user will see corresponding messages signifying that classifier was set up successfully. To run the code, GPU enabled machine is required.
- Back compatibility with Tensorflow 1.3 as required by Udacity. The current version of object detection API is based on 1.9 tensorflow and not compatible with 1.3. Instead we used an older version from this commit.
The following picures demonstrate traffic lights classifier performance for two different classes of images:
- real images taken from
just_traffic_light.bag:


- simulator images:


Note that classifier score is always above 90.
The videos below show
-
classifier performance in the simulator (by Udacity):
-
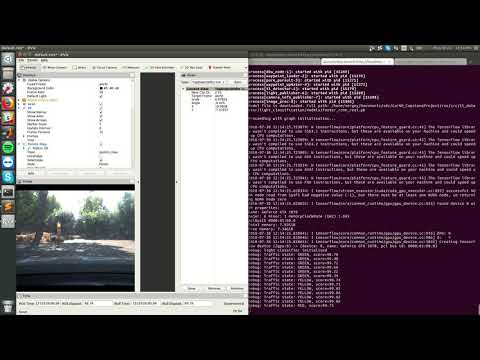
classifier performance for the
just_traffic_light.bagfile (by Udacity):
Tests were conducted using Nvidia GTX1070 8GB, i7-7700HQ.
Two methods of classification were attempted in parallel, and overall the Faster R-CNN approach above was successful. However, a full-frame classifier based on the pretrained VGG network was also attempted, which is described here. This was good enough to work in the simulator, but not with real camera images taken from Carla.
The VGG classifier can be invoked as an option by setting self.classifier = "FRCNN" in
tl_classifier.py. Most of the related work is in these separate source files however,
which were initially based on one of our submissions for the Semantic Segregation project:
/training/cnn_classifier_model.pysets up the model in TensorFlow both for training and run-time inference. This common code ensures that the same structure is set up in both cases, so that the loaded weights remain compatible./training/main.pyinvokes the model in training mode./training/helper.pycontains some common utilities, including loading the training images from disk into a Numpy array (using a generator function for memory efficiency), obtaining the correct ground truth classifications from the filename suffix.
Most recently the model was trained on
the original set of 185 simulator and 101 real images in data/training_images. The
raw command-line output is retained in ros/src/tl_detector/runs/1532796265.11/output.txt
(the location the now-pretrained weights are downloaded to on first execution). As
explained previously those first real images were from the traffic_light_training.bag
file which proved to be of low quality compared with the just_traffic_light.bag
introduced only later in the classroom. In practice the model trained itself mainly
to classify simulator images, which it did successfully.
The structure was as follows:
| Raw image input |
|---|
| Resize to (8 x 32, 11 x 32) pixels to fit memory overall (multiples of 32 because of 5 halving steps) |
| Standard VGG network |
| Flattening |
| Fully connected, reduced to depth 32 (maximum to fit GPU memory) |
| Fully connected, reduced to depth 4 (required output classes) |
The key addition of custom layers is implemented here in training/cnn_classifier_model.py:
flat_cw = tf.reshape(self.layer7_out, [-1,final_rows*final_cols*4096], name="flat_cw")
dense_cw = tf.layers.dense(inputs=flat_cw, units=32, activation=tf.nn.relu, name="dense_cw")
final_layer_cw = tf.layers.dense(inputs=dense_cw, units=self.num_classes, name="final_layer_cw")
Training end-to-end was not very successful. The intial training set was too small to train such a large model. However, freezing the VGG weights and training only the custom fully connected layers worked.
Training was later attempted using the larger set of real images in data/training_images3,
but the model failed to classify these effectively. Given the success of the Faster R-CNN approach,
it was not pursued further.
This short video shows the VGG classifier successfully running the car in simulation (with audio narrative):

In this project we have developed several modules which are connected and can be used to drive a real car. These modules are essential in solving the following problems:
- Perception (Traffic lights detection module)
- Control (DBW module)
- Basic path planning (Waypoint module)
We have prepared data for a real machine learning problem, which was not seen in the nanodegree before (usually datasets were carefully prepared for us) and was important from a practical perspective. Although we obtained a working system, there are a few things which can be improved:
- Control. MPC controller could be a more robust alternative since it is based on a vehicle model and can incorporate complex nonlinear effects.
- Braking system. The current system exhibits jerky braking, whereas with the usage of the aforementioned controller, smoother braking could be achieved.
- Perception. The Faster RCNN based on ResNet101 shows a good performance level for the traffic lights detection problem. However it is quite slow and could be greatly improved using quantisation technique as an example. Another alternative could be using the Faster RCNN based on ResNet50 that resizes images before processing.
- Path planning. The current project was tested in the environment without any other vehicles. It would be interesting to combine current developments with the path-planning project results.
To conclude, this capstone project was a good opportunity to work with people of different ages and backgrounds from different parts of the world, allowing varied perspectives and opinions on the different aspects of the project.