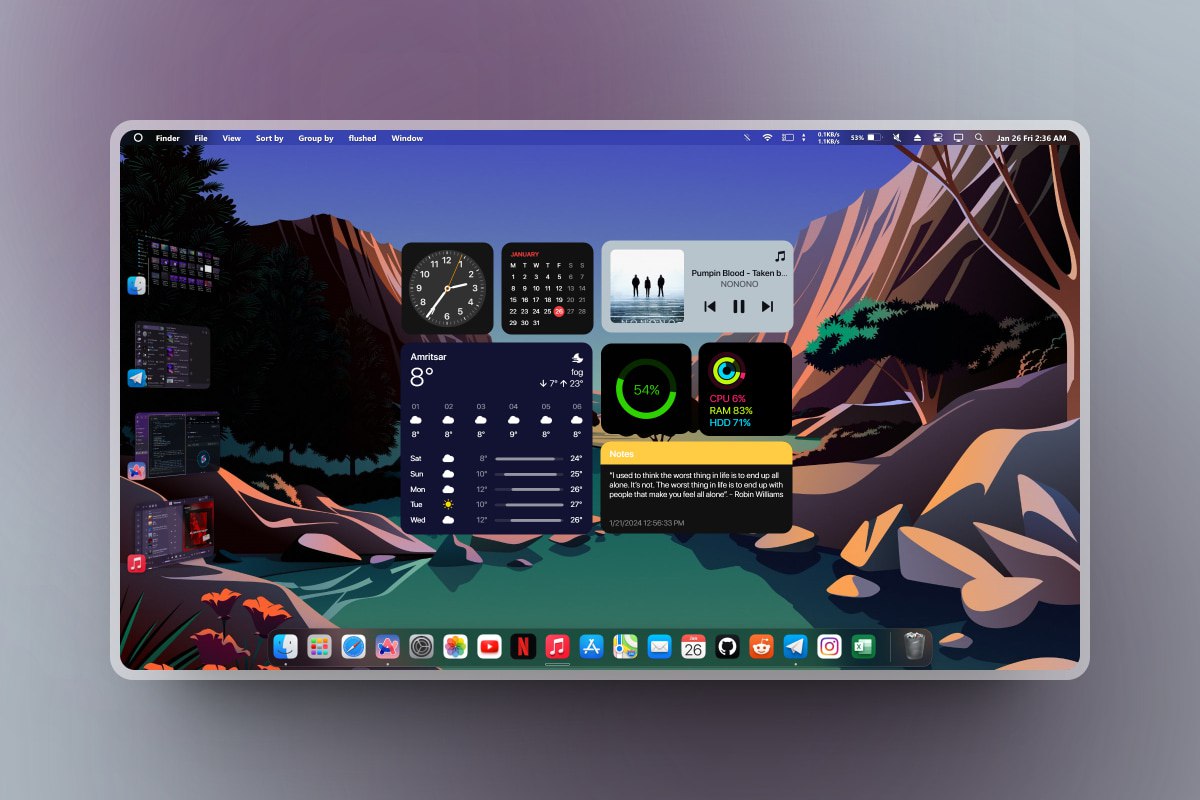
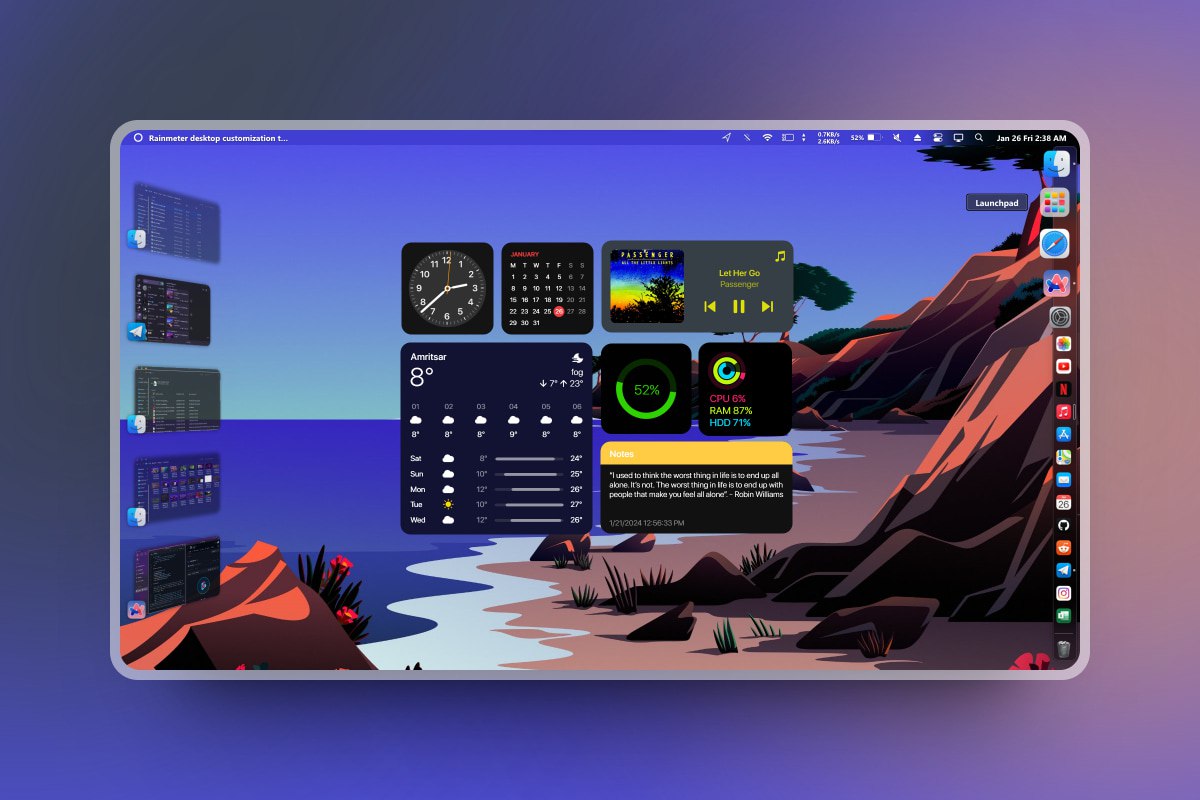
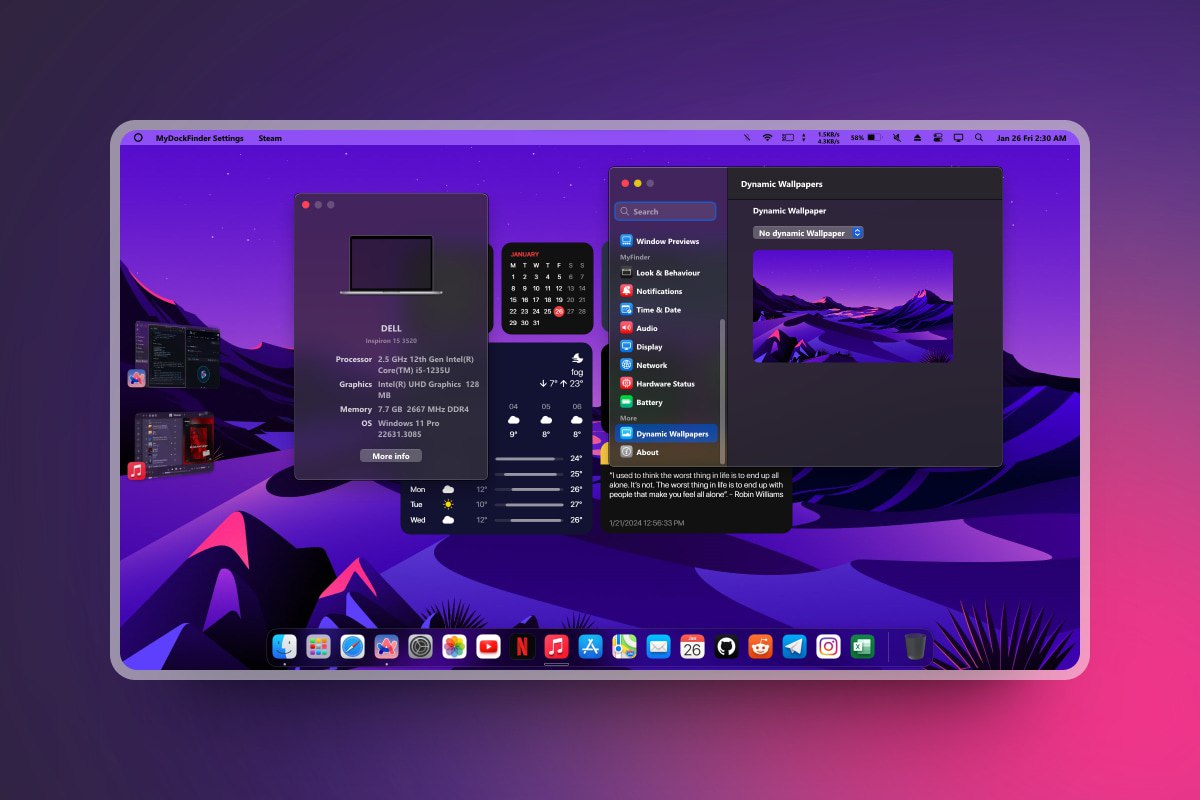
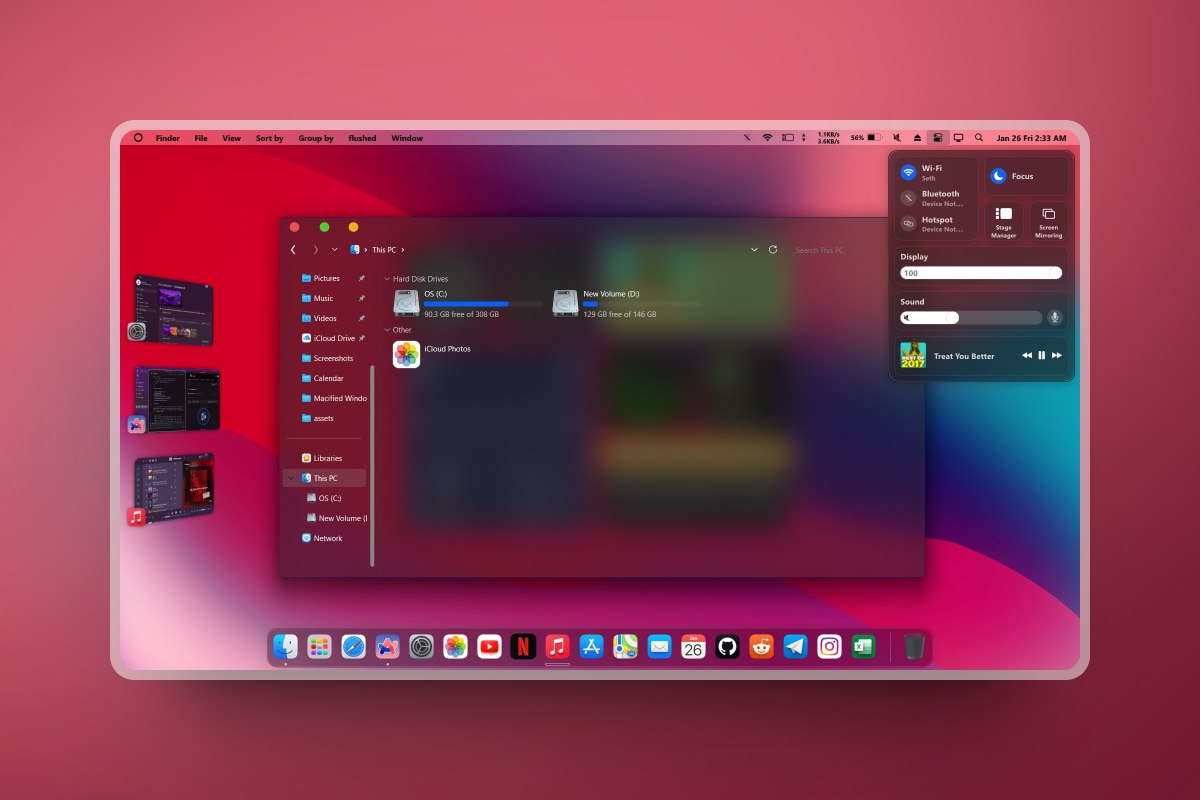
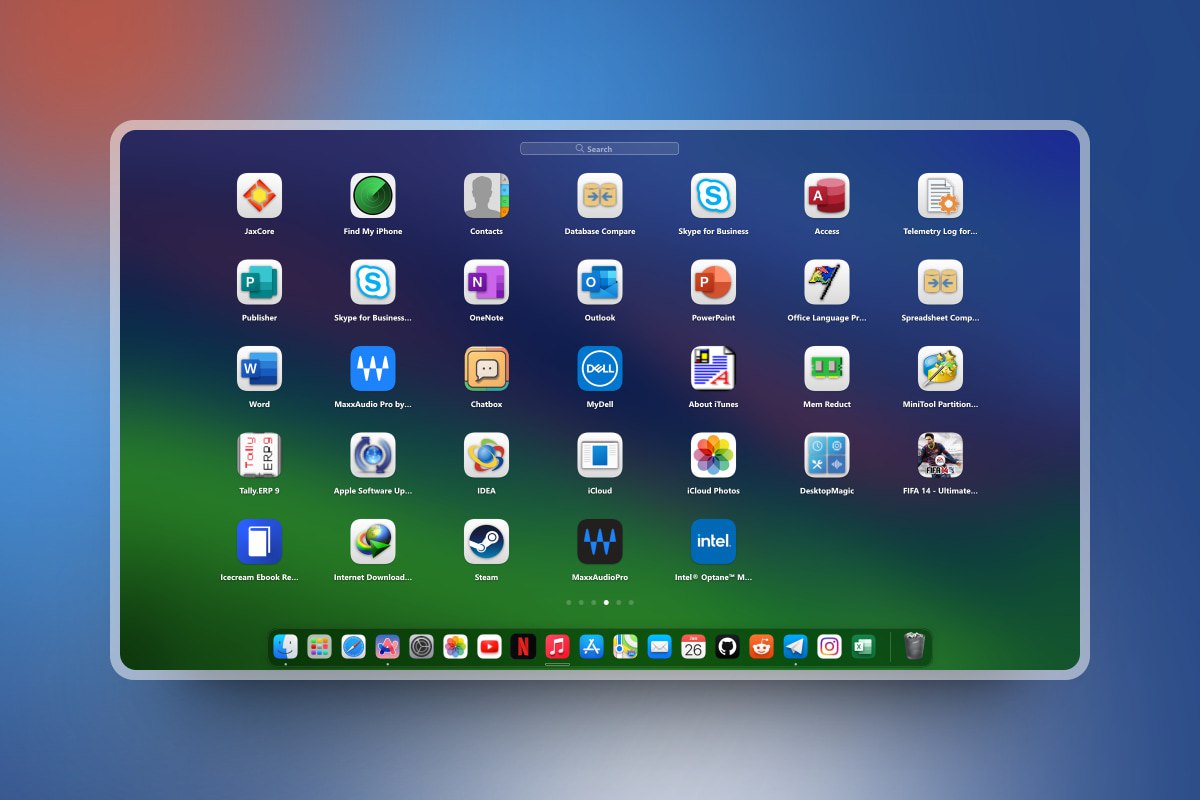
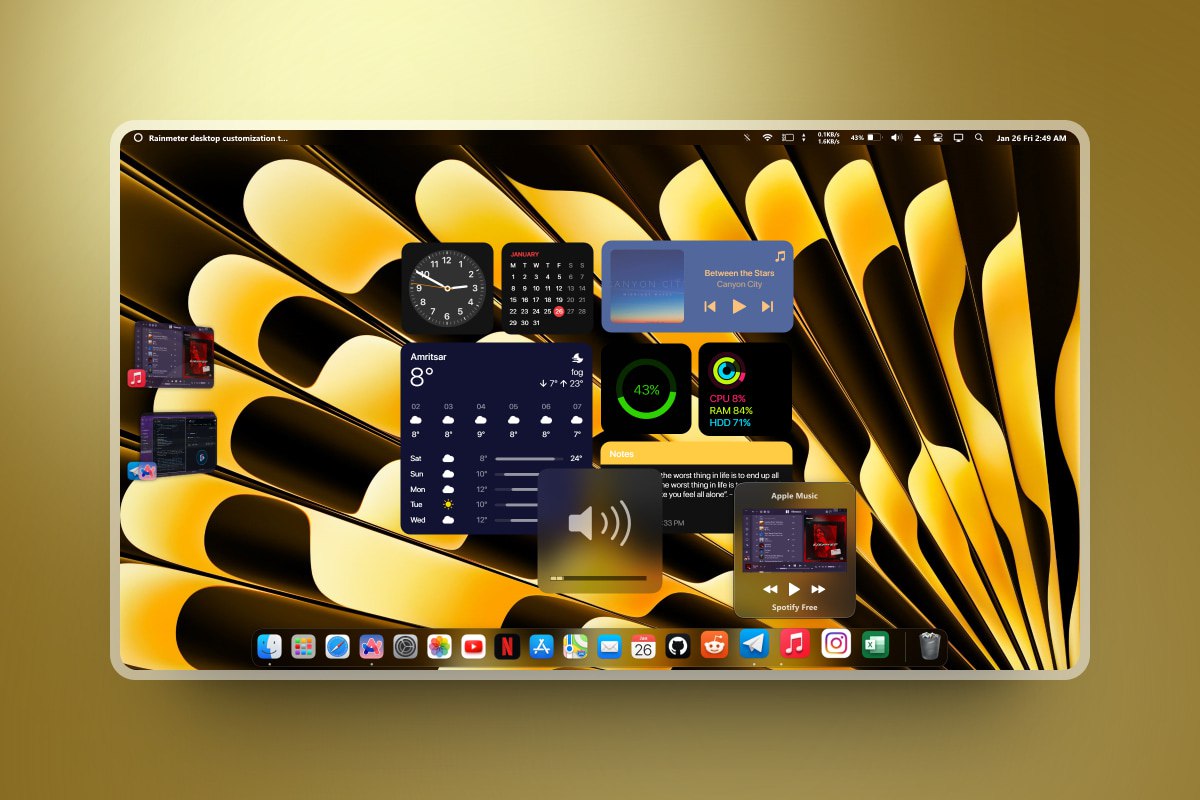
This repository contains information and tools that I use to make my Windows 11 desktop look like macOS. I will share the steps and resources that I followed to achieve this transformation, as well as some screenshots of the final result. Lets begin macifying your Windows 11 desktop :) .
- Final Look
- Themes
- Wallpapers
- Rainmeter widgets
- Dock and menu bar
- Stage manager
- System & dock icons
- File Explorer
- Cursors
- Extra customisations
- Credits
- Feedback
So this is how the final look on your windows desktop will come out. Its always subject to the amount of customisations you do. If you follow instructions as given below in every segment, you will accomplish the same as in screenshots below:
Step 1: extract the zip file and you will find a file called ThemePatcher. Open it, give permissions and patch the "Themeui" and "uxinit" by clicking on install button. Let it do its work. when its done, it will ask to reboot your pc which you gotta do.
Step 2: After rebooting, go to same folder and find the Themes zip file. Extract it, and go to following path: Themes_MacifiedWindows\macOS for Windows 11 22H2 - Mar 12 2023. In this folder you will find a folder called "Windows 11 22H2 Themes". Copy all files inside it and paste it to C:\Windows\Resources\Themes folder.
Step 3: Go to settings>personalisation>themes and select the 2nd dark theme of MacOS (MacOS-dark solid, 6 images) as first one has some bugs. Apply and with this, you will notice some changes in UI elements.
Lets move ahead to wallpapers now :)
Setting the MacOS Wallpaper in beginning will start giving you a vibe of it so you dont get lazy and bored while doing all steps. So go download the zip file of wallpapers or if you have downloaded the full package, you can simply find wallpapers zip inside it. extract it and choose any wallpaper which suits your taste.
i added around 50+ high quality wallpapers originally extracted from MacOS. These are my favs so you dont have to look out for more. still incase you dont like them or dont wanna spend 200mb on walpaper alone, you can get individual files here
Firstly you have to setup rainmeter app. Download it from here and install it.
open the Macified Windows folder and look for widgets file (rmskin extension) . Double click on it and simply install the widgets.
These widgets are already set according to the values i have filled (size and position) . Incase they dont load on their own after installing, open rainmeter app, select Macified windows from sidebar, expand it and load individual widgets seprately as per your choice.
Note: These widgets belong to different rainmeter skins i found from various sources. i combined all of them into one and removed those which arent useful. There might be some bugs in it related to settings. But you can easily change their shape by right clicking on widget and choosing "alternative" option. You can change their position too by dragging them (double click + hold + drag).
Note: This is my first rainmeter project so this package include some basic skins only. i will update this widgets package with more skins as i learn more. You can also suggest rainmeter widgets of macOS style you want to add in this skin (do provide link of that existing skin you wish to add it in this widget pack)
This is the most demanded thing.So yes, lets get started.
Step 1: Extract the dock_MacifiedWindows.rar file. There will be "dock_macifiedwindows" folder which you gotta open. Again same folder (same name) will appear and open it again. (sorry for this duplication, i forgot to fix)
Step 2: Inside that folder, there will be many folders and files. Find the dock_64.exe file or dock.exe and open it.
Step 3: Boom, thats it. Dock and menu bar will appear.
You will notice taskbar overlaying on dock or menu bar not appeared. So you have to change some settings
Step 4: Bring your mouse over dock and right click on some empty space. Select "preferences" from the list that appears which will open a settings page.
Step 5: Open advanced settings on sidebar (leftside) and scroll to last where you will find an option called "dock layout backup". Open the drop down list there and select "Macified Windows". It will ask to restore that backup and then the app will restart itself. Thats all, your dock is now fully setup
Note: You might notice that some applications on dock dont open. This is because they arent installed in your PC/laptop. You can remove that icon and add your favourite ones. Menubar doesnt need much changes. you can customise it as per your likings.
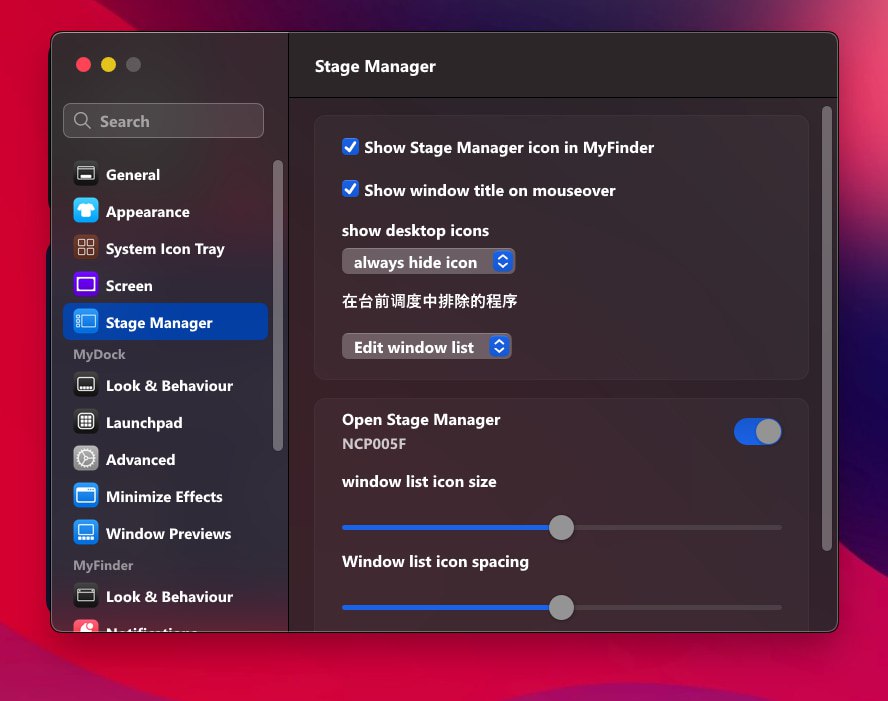
Open preferences option as you did in step 4 of Dock and menu bar. Keep the same settings as shown in screenshot below
Lets change system icons first, to that of macOS.
Step 1: You extracted themes_macifiedwindows.zip in #Themes segment. Open the extracted folder which will open folder "macOS for Windows 11 22H2 - Mar 12 2023" . open this folder too and then open folder called "7tsp for Control Panel and Winver Colors" . Inside it rename the file "7tsp macOS Day & Dark EXTRAS.7z.remove" by deleting ".remove" so its extension changes to 7z
Step 2: Go back one step and open folder called "7tsp icon themes" . Do the same thing here by deleting .remove so its extension changes to 7z.
Step 3: Go back to main folder and extract "7tsp_MacifiedWindows.zip". Extract it, rename the 7tsp.ee file to 7tsp.exe (add x in between the extension "ee" ) . Now its an exe file and open it, give permissions and wait a sec for it to open.
Step 4: When its launched, you will see a button called "add a custom pack" . click it and select the 7z file you got in step 1. Patch it and reboot pc. Do the same process again with 7z file in step 2. With this, you will have MacOS icon pack installed in your pc.
Now time for dock icons. This is a tough job as you gotta download icon for every app (you want to have on dock) and then apply it manually.
Step 1: To do this, download icon (png or jpg) from google search. Make sure they are with transparent background or you can remove background using edit feature of photos app.
Step 2: Right click on app icon on dock whose icon you wanna edit. Choose "edit this icon" and a windows will pop-up.
Step 3: click on existing icon which will take you to file explorer to choose new icon. CHoose the downloaded icon file and select ok.
Step 4: Now its applied but wait, dont close the windows. You will see an option "scale icon to macOS standards" which will be already ticked. untick and tick it back. Now click ok on top right corner.
Step 5: All done, your new icon is applied.
You can achieve blurry macOS look in file explorer using ExplorerBlurMica shared in releases tab. Extract the zip file and follow this guide . choose effects as blur (put value as 0) . More instructions in Extra customisations shared in the end.
Step 1: Extract cursors zip file and open the folder which appears. You will see a file called "install.inf". Right click on it and choose install option. Now the cursor pack is installed
Step 2: Go to settings>personalisation>Themes>Mouse cursors which will open a new window called "mouse properties" . open the drop-down list in scheme under "pointers" category. Select "mac :)" from there and apply. click ok and now its done.
Coming soon
This repo is all written and maintained by me aka Sahil
Aqua and blueboy for testing some tools.
Unknown for project name.
Samcux on youtube for guides.
and respective app/softwares developers whose products i used in this project.
If you find any broken or wrong text or link Please report me or if you want to add suggestions, open a new issue or text me in Telegram @MaybeSahil
You can join our support channel where i will post beta updates to test new versions. here is the link
Do star this repo to show your support and share as well, means a lot. Thanks, see yaa 💝
