
Based on MoErgo's template and Gaétan Lepage's flake.
This repo contains the current config for my Glove80 keyboard. The keymap was initially built using MoErgo's Layout Editor, however it is now maintained using Keymap Editor with occasional manual tweaking.
The keyboard firmware can be built locally using nix, which is also used for automatic builds.
Keymap Drawer is used to render images of each layer (see below).
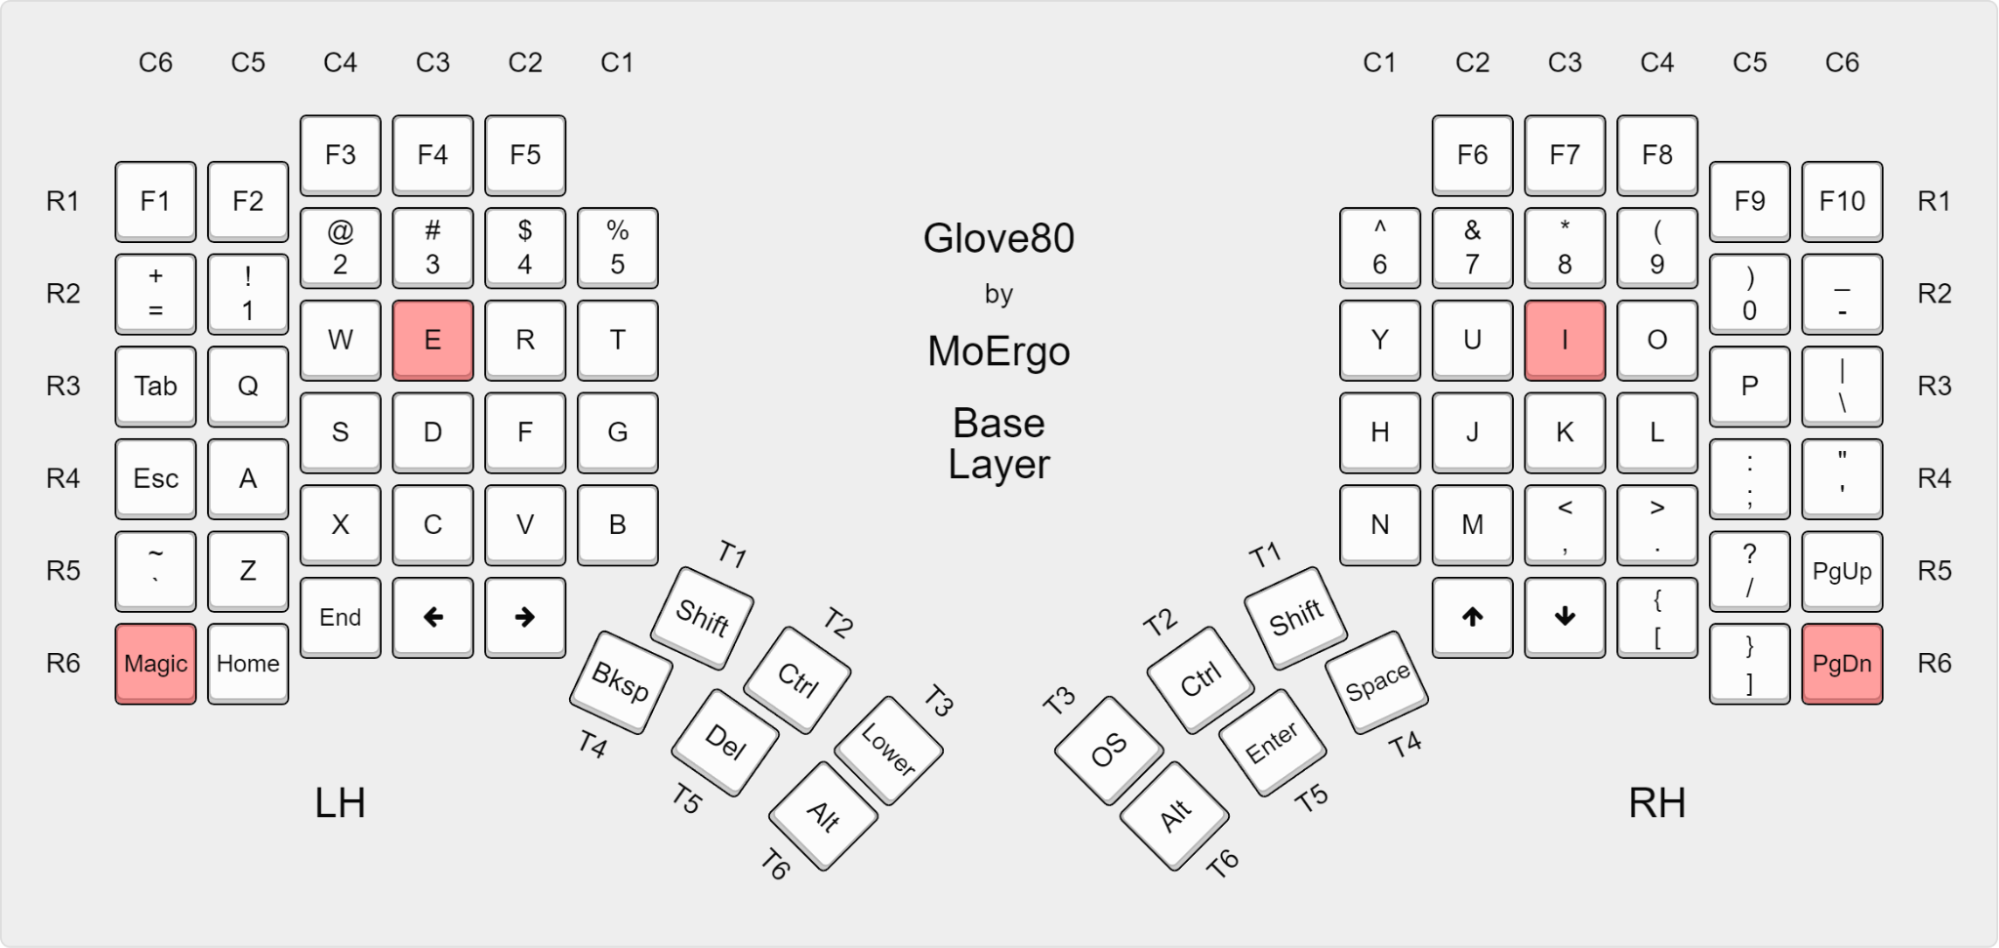
The default base layer uses Colemak DH. Some punctuation is moved around using Mod Morphs, and useful stuff is placed on the thumb keys.

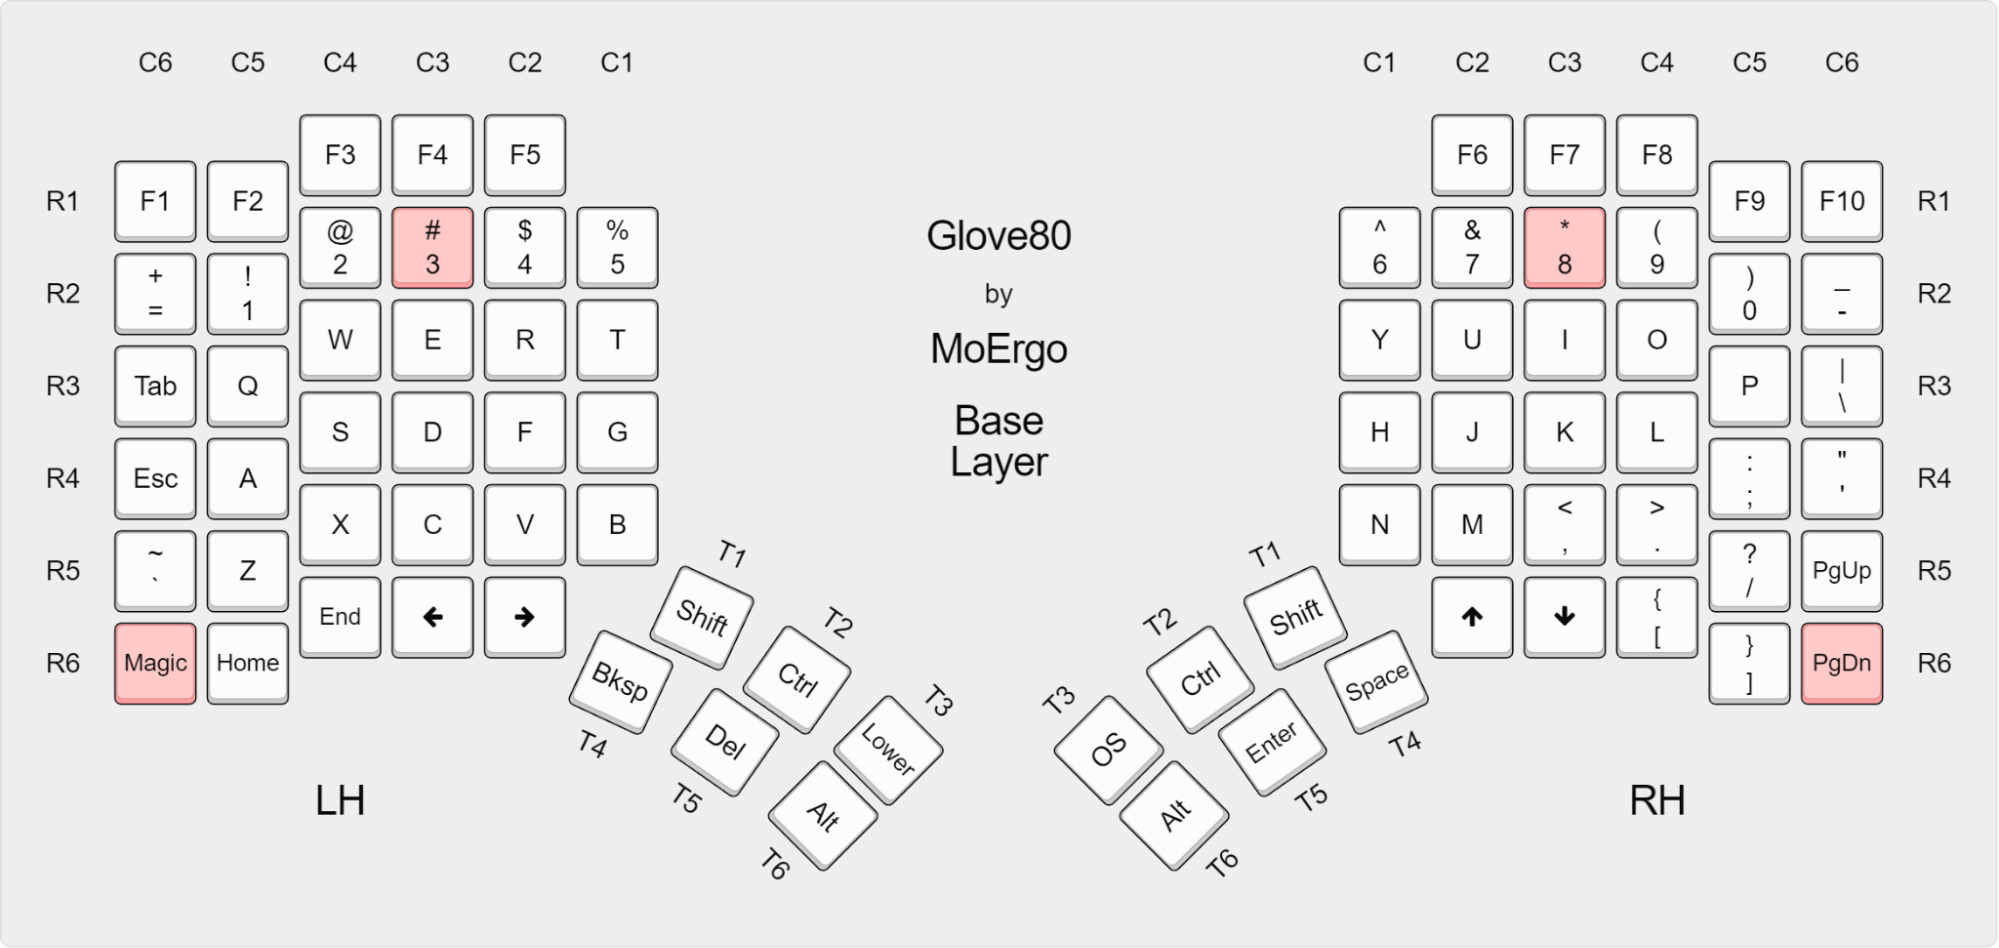
There is a secondary Qwerty base layer available as a fallback:

A gaming layer extends Qwerty, shifting WASD to a more comfortable position.

Readily accessible from a thumb key, the symbols layer attempts to find comfortable positions for commonly used programming symbols.

Also on the thumb keys, a nav layer has a comfortable numpad and navigation keys.

I may consider switching from a numpad layout to a 2x 4-finger numrow in an attempt to keep everything closer to the home row. Alternatively, moving the 0 key up may have the same effect.
As standard on all Glove80 keyboards, a Magic layer provider access to system utilities, such as Bluetooth settings and RGB lighting config.

Before flashing, ensure udisks2 is setup and enabled so that the keyboard can mount its bootloader storage device.
services.udisks2.enableNixOS optionsystemctl status udisks2.serviceudisksctl status
The easiest way to flash the firmware is using nix run.
cdinto the project root- Connect the right half (in bootloader mode)
- Run
nix run - Connect the left half (in bootloader mode)
- Run
nix run - Done!
You can also manually copy the uf2 firmware file to the keyboard.
The firmware can be built locally using nix build and will be written to ./result/glove80.uf2.
Alternatively, the firmware can be downloaded from GitHub Actions's artifacts.
Connect the keyboard half in bootloader mode, then copy the firmware file into the keyboard's USB storage. The keyboard will unmount when it has finished flashing.
See the user guide for more info.
- Hold the
C6 R6key (extreme bottom corner) - Also hold the
C3 R2key (middle-finger; ColemakForU, QwertyEorI) - Power on the keyboard
- Slow LED: in bootloader mode and connected via USB.
- Fast LED: in bootloader mode but there is no USB connection.
- Solid or no LED: not in bootloader mode.
See the user guide for more info.
Similar to booting into bootloader mode, but use R2 (numrow) instead of R3. Hold for ~5s powered on, before powering off again.
Note, the reset will not affect the saved keymap. Instead it wipes things like Bluetooth devices.
To re-pair the two halves: first power both on at the same time, then toggle RGB on/off with (Colemak) Magic+B or (Qwerty) Magic+T.
See the user guide for more info.
When tapping the Magic key, status indicators will appear on the Bluetooth keys.
![]() Connected (in use)
Connected (in use)
![]() Connected (not in use)
Connected (not in use)
![]() Paired (not connected)
Paired (not connected)
![]() Not paired
Not paired
- First ensure the profile is unpaired (white status LED)
- Select the profile
- Pair using the host device's interface
Unpair the selected Bluetooth profile using the BT_Clear key (see magic layer above). Alternatively unpair all devices using BT_Clear_All.
-
MoErgo's Glove80 Support page.
-
MoErgo's Discord Server.
-
ZMK's Discord Server.
-
MoErgo's ZMK Distribution.