This repository contains the template to be used for the Final Project for the Coursera course Introduction to TDD/BDD.
This repository is to be used as a template to create your own repository in your own GitHub account. No need to Fork it as it has been set up as a Template. This will avoid confusion when making Pull Requests in the future.
From the GitHub Code page, press the green Use this template button to create your own repository from this template.
Name your repo: tdd-bdd-final-project.
After entering the lab environment you will need to run the setup.sh script in the ./bin folder to install the prerequisite software.
bash bin/setup.shThen you must exit the shell and start a new one for the Python virtual environment to be activated.
exitIn this project you will use good Test Driven Development (TDD) and Behavior Driven Development (BDD) techniques to write TDD test cases, BDD scenarios, and code, updating the following files:
tests/test_models.py
tests/test_routes.py
service/routes.py
features/products.feature
features/steps/load_steps.py
You will be given partial implementations in each of these files to get you started. Use those implementations as examples of the code you should write.
Licensed under the Apache License. See LICENSE
John Rofrano, Senior Technical Staff Member, DevOps Champion, @ IBM Research
In the tests/factories.py file, use the Faker providers and Fuzzy attributes to create fake data for the name, description, price, available, and category fields by adding them to the ProductFactory class.
class ProductFactory(factory.Factory):
    """Creates fake products for testing"""

    class Meta:
        """Maps factory to data model"""

        model = Product

    id = factory.Sequence(lambda n: n)
    name = FuzzyChoice(
        choices=[
            "Hat",
            "Pants",
            "Shirt",
            "Apple",
            "Banana",
            "Pots",
            "Towels",
            "Ford",
            "Chevy",
            "Hammer",
            "Wrench"
        ]
    )
    description = factory.Faker("text")
    price = FuzzyDecimal(0.5, 2000.0, 2)
    available = FuzzyChoice(choices=[True, False])
    category = FuzzyChoice(
        choices=[
            Category.UNKNOWN,
            Category.CLOTHS,
            Category.FOOD,
            Category.HOUSEWARES,
            Category.AUTOMOTIVE,
            Category.TOOLS,
        ]
)Before we proceed with creating test cases for the Product Model, let us see the different attributes used in this model:
| Attribute | Description |
|---|---|
| id | The id of the product |
| name | The name of the product |
| description | The description of the product |
| price | The price of the product |
| available | True if the product is available, otherwise False |
| category | The category under which the product belongs |
The first thing you need to do while creating test cases for the Model, is ensure that the database model is working correctly. Someone wrote all of the code but only wrote a test case for create. You have no idea if the other functions work properly or not.
Create test cases in tests/test_models.py to exercise the code in service/models.py to test that the Product model works.
- Write test case to read a product and ensure that it passes
- Write test case to update a product and ensure that it passes
- Write test case to delete a product and ensure that it passes
- Write test case to list all products
- Write test case to search for a product by name and ensure that it passes
- Write test case to search for a product by category and ensure that it passes
- Write test case to search for a product by availability and ensure that it passes
Now that you know that the model is working, you can move on to developing the REST API which will accept json requests, call the model, and return an answer as json.
Your REST API must implement the following endpoints:
- Create a Product
- Read a Product
- Update a Product
- Delete a Product
- List all Products
- List Products by Category, Availability, and Name
Edit the test cases in tests/test_routes.py and code in service/routes.py for a RESTful endpoint using Flask that contains the following endpoints:
- Write a test case to Read a Product and watch it fail
- Write the code to make the Read test case pass
- Write a test case to Update a Product and watch it fail
- Write the code to make the Update test case pass
- Write a test case to Delete a Product and watch it fail
- Write the code to make the Delete test case pass
- Write a test case to List all Products and watch it fail
- Write the code to make the List all test case pass
- Write a test case to List by name a Product and watch it fail
- Write the code to make the List by name test case pass
- Write a test case to List by category a Product and watch it fail
- Write the code to make the List by category test case pass
- Write a test case to List by availability a Product and watch it fail
- Write the code to make the List by availability test case pass
The first thing you will need to do for BDD testing, is write the Python code to load the data from the background: statement in the products.feature file. Remember that the data is stored in the context.table attribute and each row is a Python dictionary (dict) that you can dereference using the names at the top of the columns in the background: statement.
Update the features/steps/load_steps.py file to load background data from your BDD scenarios into your service before each scenario executes.
The code to delete all of the products is already given to you. You just need to write the code to load the products from context.table.
Now that the background data is loaded, it’s time to write the scenarios to test the UI. The Create a Product scenario is already written as an example of what you need to do.
The service already contains a UI that looks like this:
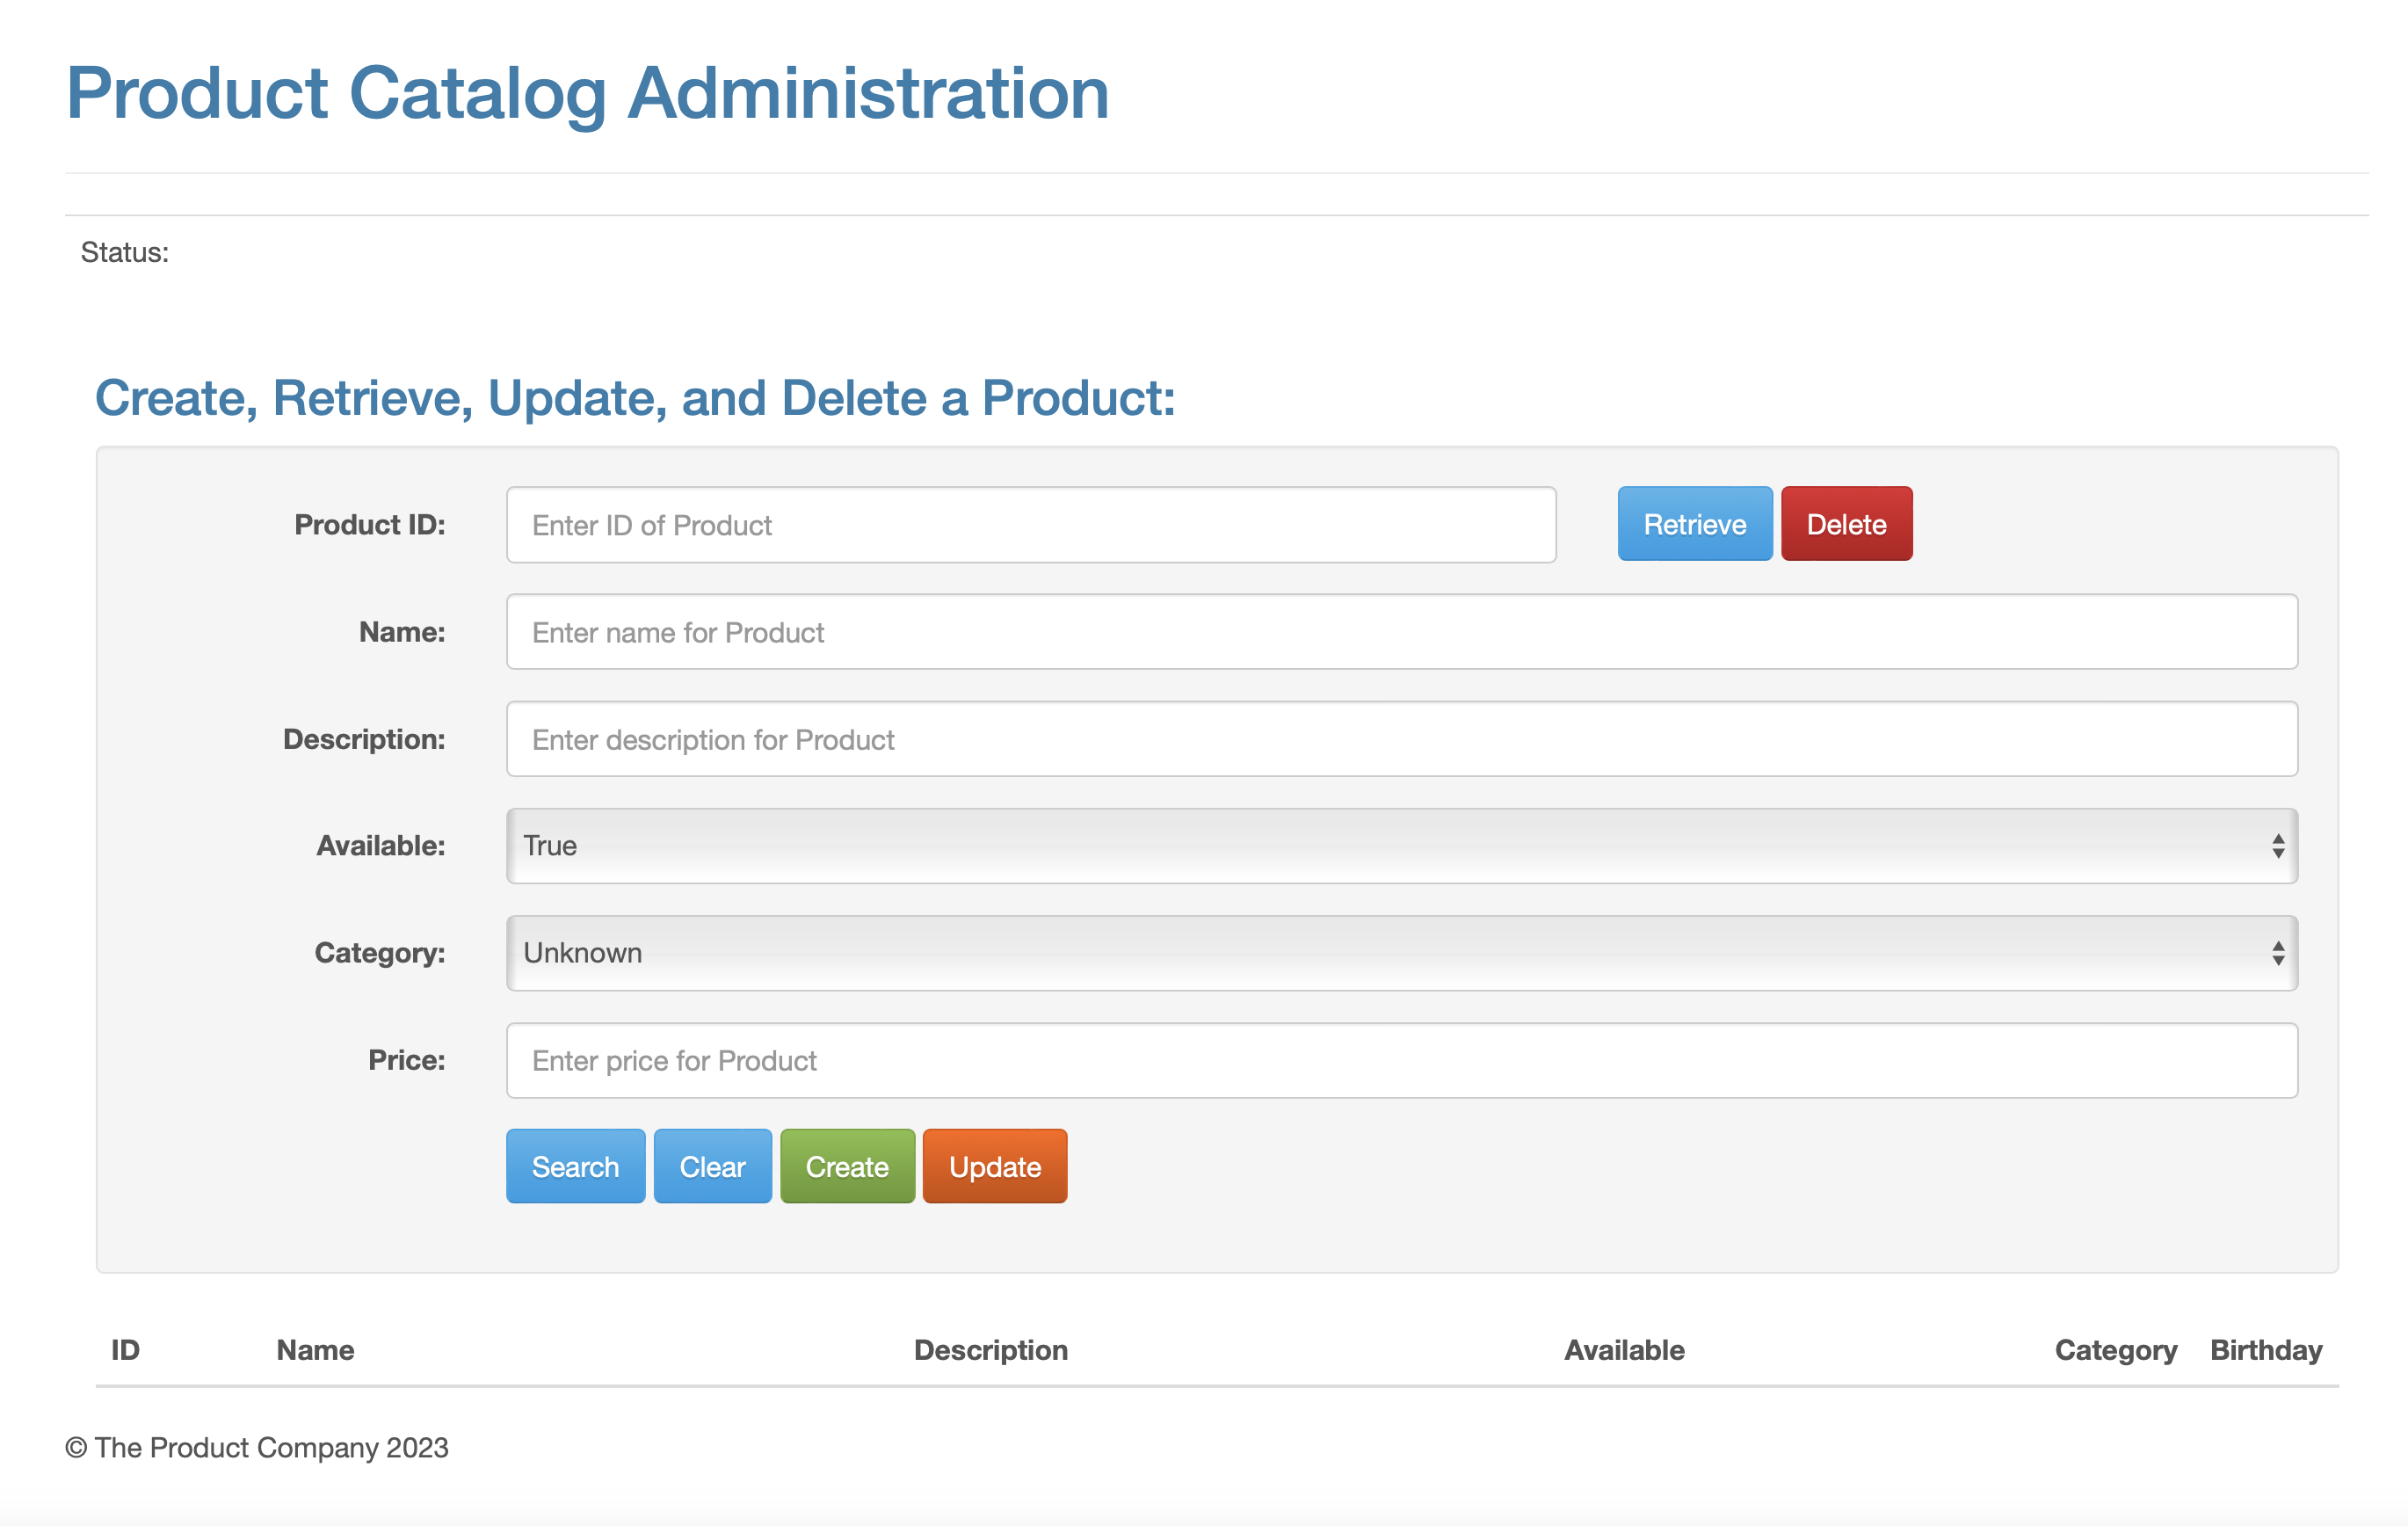
- Update the features/products.feature file with BDD Scenarios that prove that the following behaviors of the UI work as expected:
- Read a Product
- Update a Product
- Delete a Product
- List all Products
- Search for Products by Category
- Search for Products by Availability
- Search for Products by Name
In BDD, test scenarios are often written in a human-readable format, such as Gherkin, and these scenarios are translated into automated tests using step definitions.
The web_steps.py file contains the step definitions for the web-related actions on the UI.
Please check [Hands-on Lab: Implementing Your First Steps](link to the lab page to be included) for any reference you may need to understand about how step definitions are implemented, before proceeding further.
The step definitions for the first few steps are already given to you.
Update the features/steps/web_steps.py file with the remaining step definitions.
Start by opening the file web_steps.py.