-
Notifications
You must be signed in to change notification settings - Fork 144
Home
To have a CRUD page for your model, you have to do the following steps,
Firstly need to create a model in your application, inside the models folder. The model should which extend from eloquent class, add an attribute and call it $table to class it should hold the name of the table, which the model represents. Example:
class Category extends Eloquent {
protected $table = 'category';
}
You can publish the config of the package by this command
php artisan config:publish Serverfireteam/panel
It will create a config.php file in the folder YourApplication\app\config\packages\serverfireteam\panel\ and it has the following content:
return array (
'crudItems' => array(
)
);
in order to get it working with our example just modify the array like below:
return array (
'crudItems' => array(
"Categories" => "Category"
)
);
for each entity you want to have CRUD links, you should add a pair of key and value to crudItems array, the
key is the text you need to be displayed on the link in menu and the value is the name of your model. The dashboard will look like this after these changes, a link to CRUD of categories is added to the left side of the page and a also a box that contains the same link. The link is like http://yourdomain/panel/Category/all.

In order to get that link working we need to create a Controller.
To create a controller in your application, go to the controllers directory and create a controller, this file should extend from the CrudController of the package. Therefore you have to either add
use Serverfireteam\Panel\CrudController; or extends \Serverfireteam\Panel\CrudController
class CategoryController extends CrudController{


 public  function all($entity){

    parent::all($entity);

    $this->filter = \DataFilter::source(new Category());
    $this->filter->add('id', 'ID', 'text');
    $this->filter->add('name', 'Name', 'text');
    $this->filter->submit('search');
    $this->filter->reset('reset');
    $this->filter->build();
    $this->grid = \DataGrid::source($this->filter);
    $this->grid->add('id','ID', true)->style("width:100px");
    $this->grid->add('name','Name');
    $this->addStylesToGrid();
    return $this->returnView();
}

public function edit($entity){

     parent::edit($entity);

   $this->edit = \DataEdit::source(new \Category());

    $this->edit->label('Edit Category');
    $this->edit->add('name','Name', 'text')->rule('required|min:5');
    $this->edit->add('description','description', 'text')->rule('required|min:5');

    return $this->returnEditView();
  }
 }
The class extends from the CrudController and it should implements 2 methods of the class, all($entity) and edit($entity). This class is taking advantage of the Zofe/Rapyd package. You can find more details about it on the following link: Zofe/Rapyd
if you have already a controller with the same name, or you need to use this Class for any other purposes just add a namespace to the Controller, put it in a folder. Then, add this to your config file 'controllers' => 'namespace\of\yourFile'
For example,
 <?php
    namespace App\Controllers\panel;

   use Serverfireteam\Panel\CrudController;
   use \Illuminate\Routing\Controllers;

   class CategoryController extends CrudController{
Then you need to add this to the return array of config file
'controllers' => 'App\Controllers\panel'
then the controllers will be automatically load from this namespace.
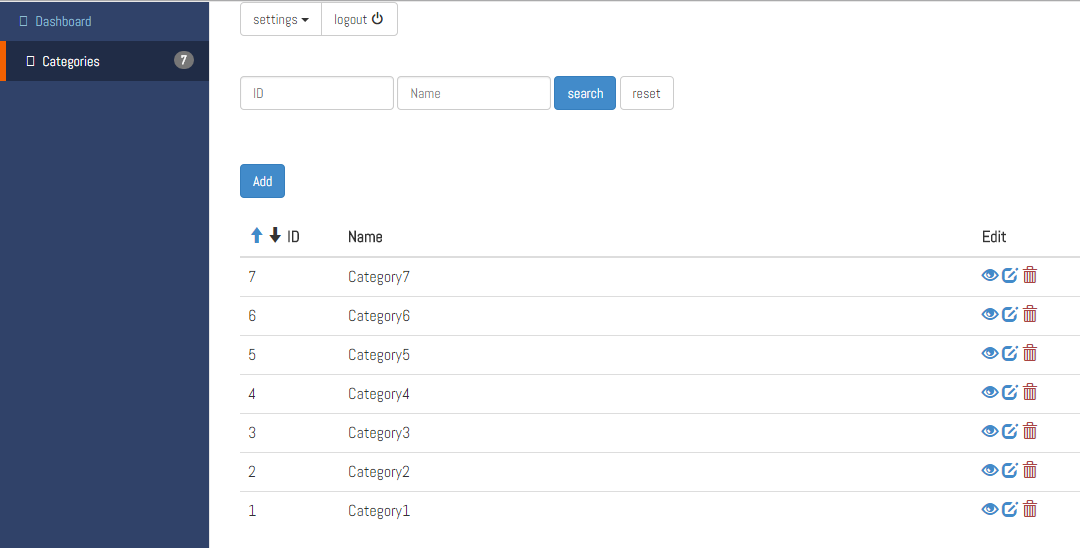
The all method: is responsible for displaying all the rows in the table which models represents. in this example it will display all the Categories in Category table with the id and name attributes. The routes for it is automatically configured and you just need to type http://yourdomain/panel/Category/all in the browser and you will see a list of categories like this:

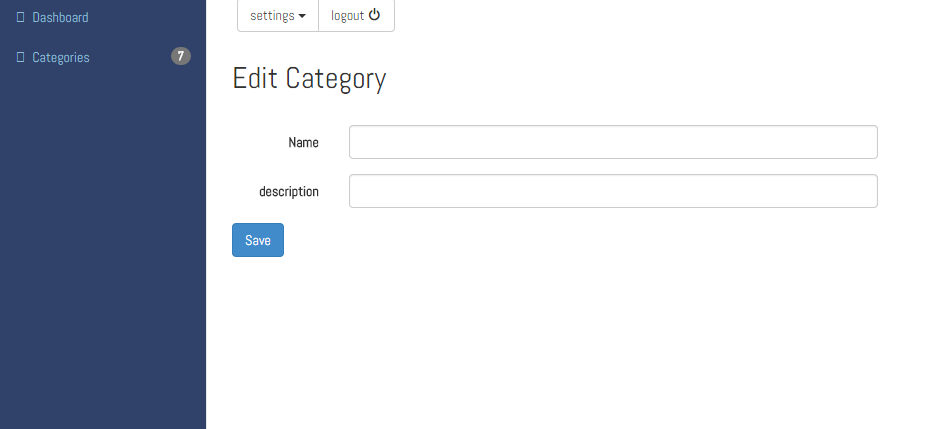
edit method creates (Add, edit and show Buttons): by implementing edit method, the buttons are automatically working buttons in interface. Add button is added to top left side of the list, by clicking on it you will be redirected to a page with the following url for adding new entities to your tables. http://yourdomain/panel/{nameOfModel}/all in this example http://yourdomain/panel/Category/edit edit and show buttons are on the right side of each row in the list by clicking on them you can either display or edit one of the entities of the list. The edit page looks like this:
